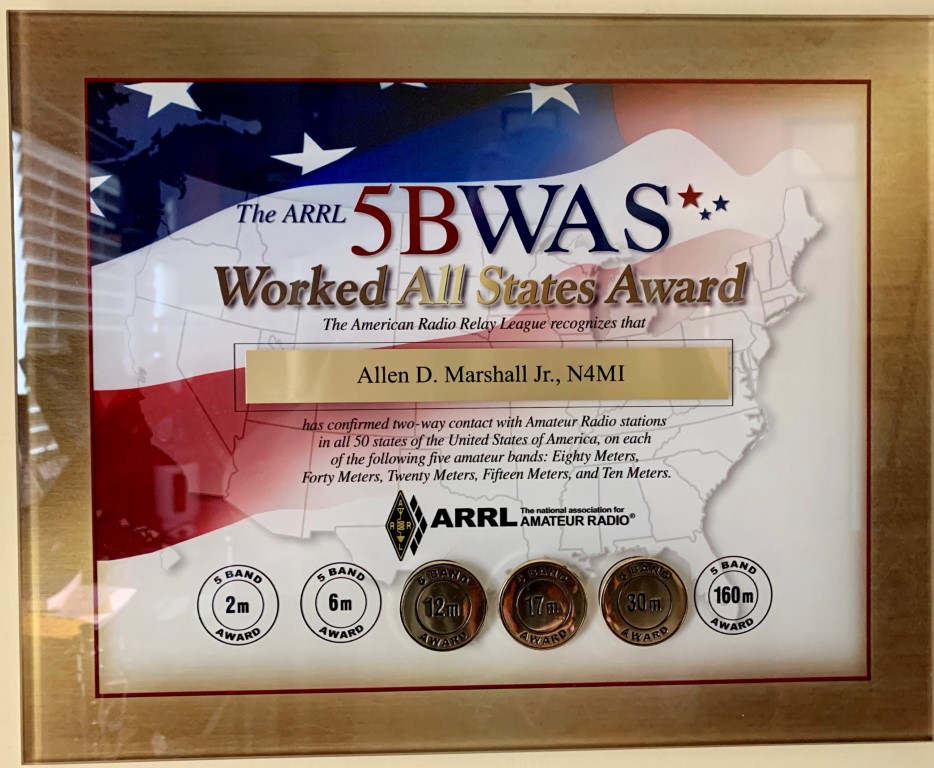
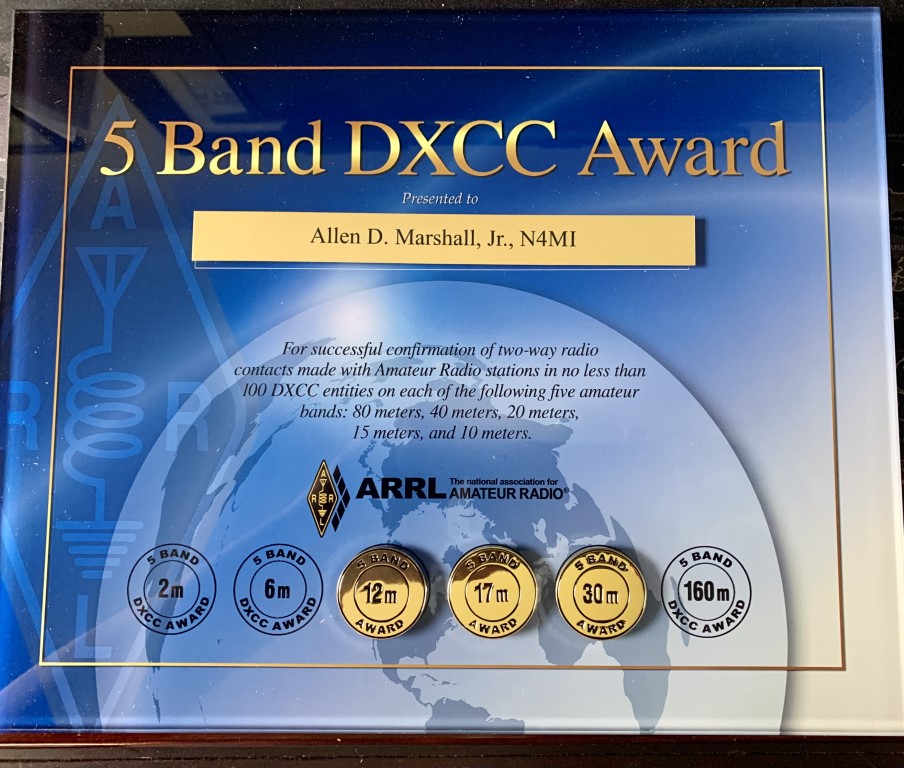
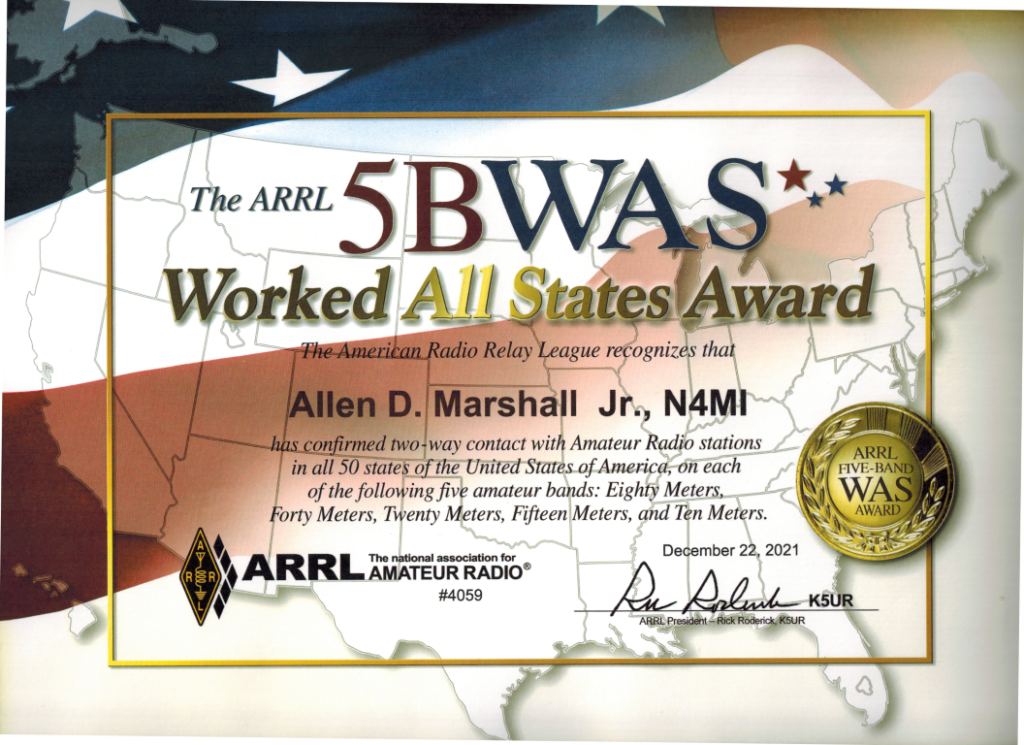
Ever since I got my ham radio license, just over 6 years ago, I have been interesting in DXing, contesting, and awards. I started out at the bottom of a solar cycle, which helped me learn how to make contacts under less than ideal conditions. I’m not as much into the competition with other hams, but it’s satisfying to set and achieve my own personal goals. Now that band conditions are starting to become more favorable, I was recently able to achieve two longtime goals, which are the 5 Band Works All States (WAS) and 5 Band DXCC awards.
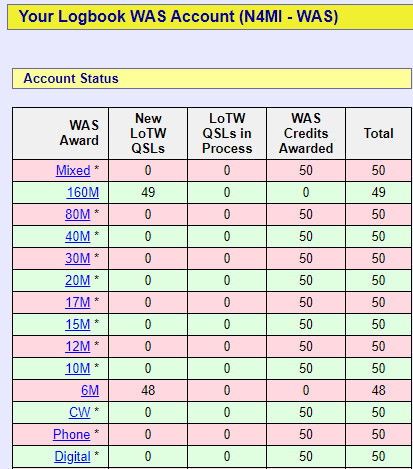
The last band I needed for both WAS and DXCC was 10 meters. The band conditions improved enough over the past few months to make that possible. I was also able to add endorsements for 30 meters, 17 meters and 12 meters. I still need Alaska and Hawaii for WAS on 6 meters, and Hawaii for WAS on 160 meters. Maybe someday!
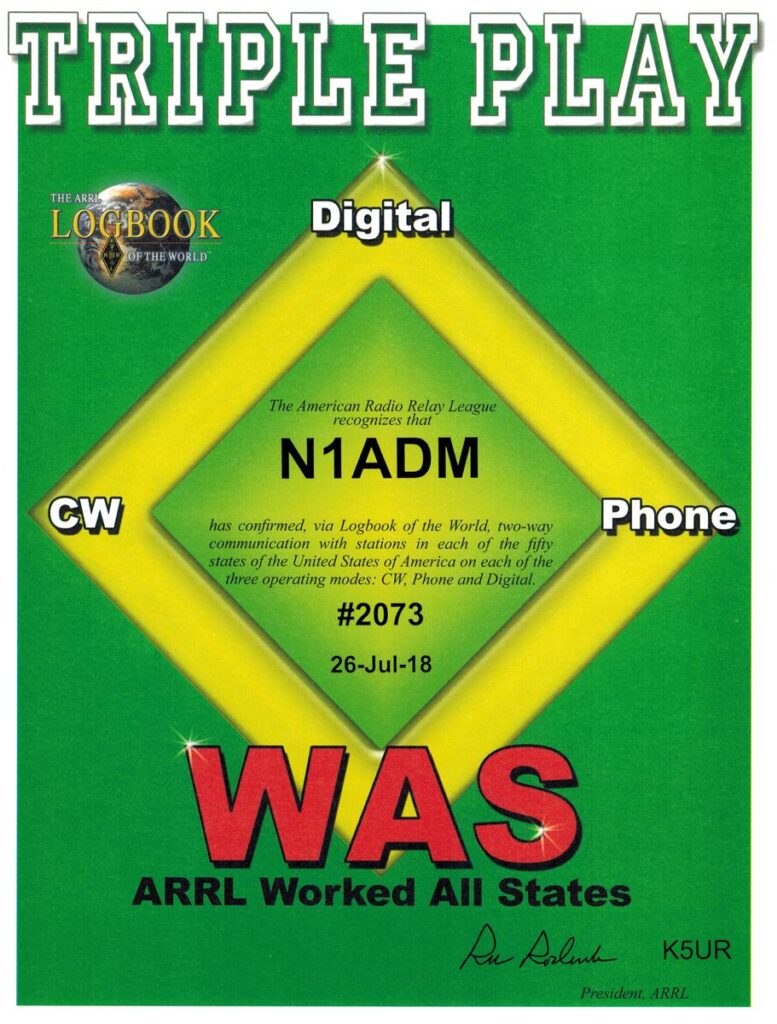
I was able to complete the Triple Play WAS award a few years ago.
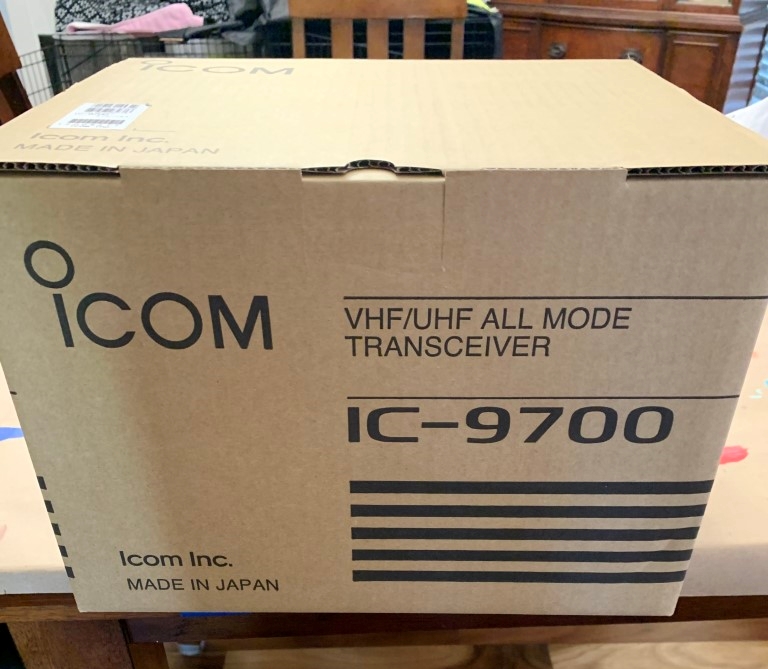
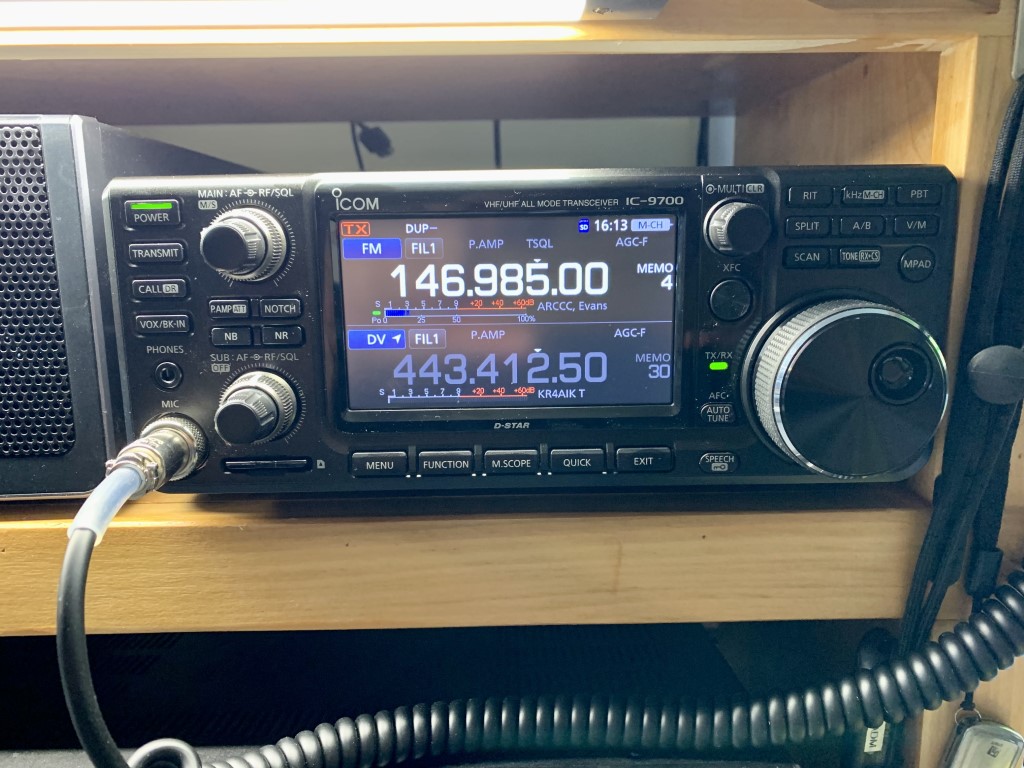
After a long wait, I finally added an Icom IC-9700 to improve the VHF and UHF capability in my shack. I decided to place an order in late December, but all of the ham radio dealers were out of stock at the time. I placed the order, and the dealer estimated delivery in February. That later slipped to March, and then to April. This morning, April 3rd, it finally arrived!
Ready for unboxing!It took about a half hour to get the radio connected and in place.
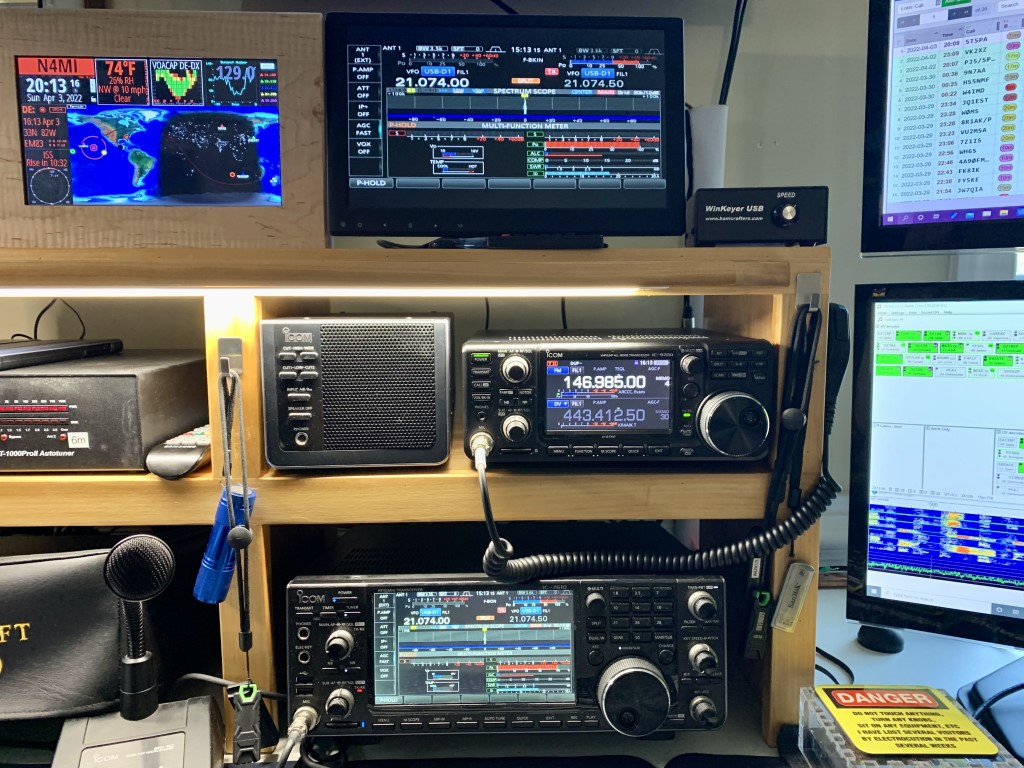
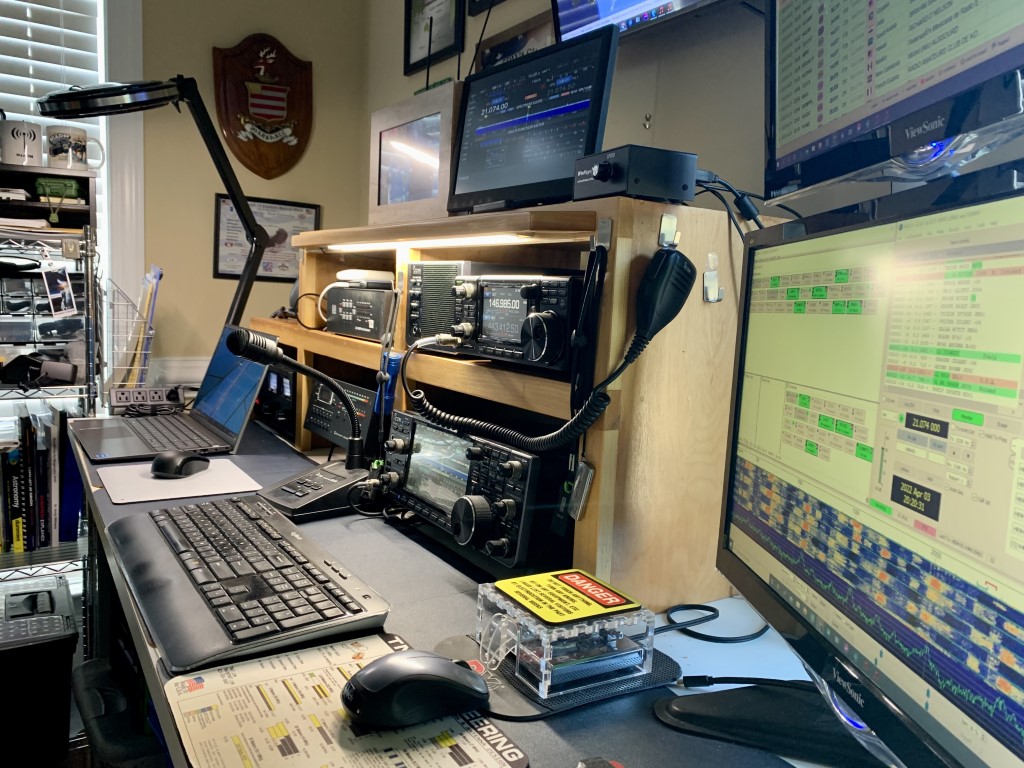
Initial setup was fairly easy, since I already had the power cable, USB cable, ground wire, and coax routed to the spot on my desk for the IC-9700. Since my current VHF/UHF antenna is a Diamond X500HA for 2M and 70cm, I will not get to use the 23cm right away. I used a Diamond MX-72N duplexer, because the IC-9700 has separate 2M and 70cm connectors.
A very nice addition to the shack!
To make programming the radio a little bit easier, I purchased RTSystems WC-9700 software. I use RTSystems programmers for all of my other radios, and it saves a lot of time and effort. The D-Star Calc feature makes adding D-Star repeaters and reflectors a breeze.
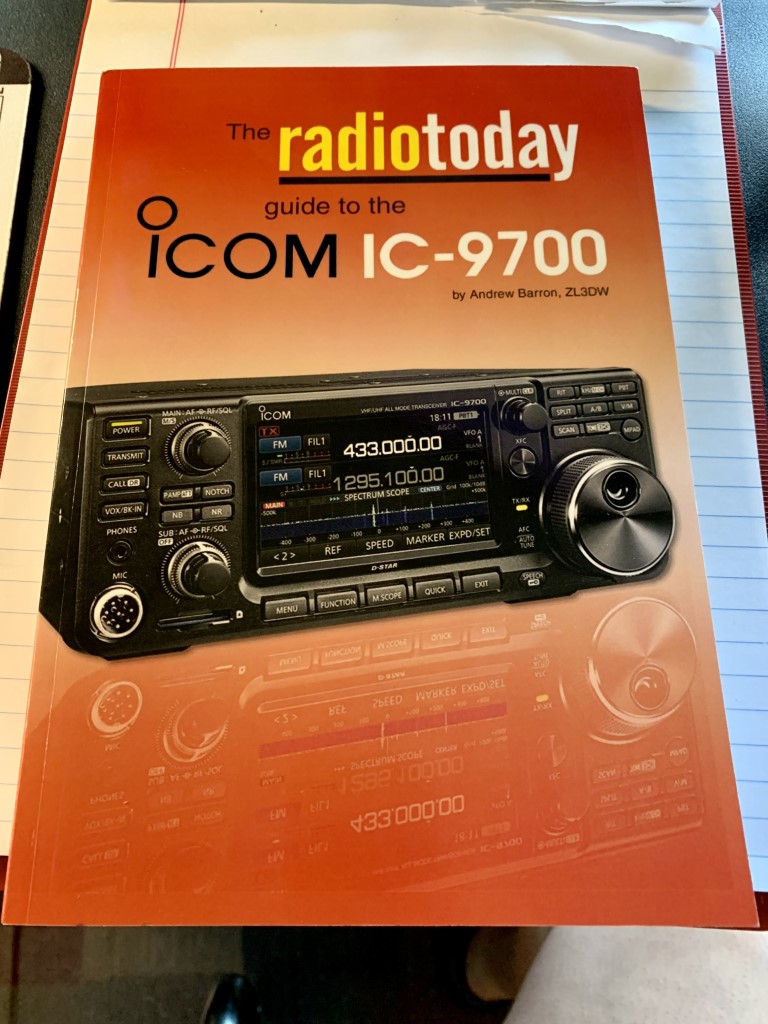
The IC-9700 has lots more features and settings than any of the other VHF/UHF transceivers I used. Even though I am very familiar with the Icom interface and controls, it’s clear that I will have a learning curve to get the best out of this radio. To help with setting up and learning the many features of the radio, I also got a copy of the Radio Today Guide to the IC-9700, by Andrew Barron, ZL3DW. I also have his guides for the IC-7300, IC-7610, and IC-705.
If you buy one of the new Icom transceivers, get this book!
I’m looking forward to seeing what this radio can do. I am going to try out using digital modes on VHF and UHF. My long-term plans include getting a new triband (2M, 70cm, 23cm) antenna to take full advantage of all three bands. I am also considering adding additional antennas to work amateur radio satellites.
Last month, I was given the opportunity to participate in a 30-day test and review of the Bilal Isotron 40M antenna for the 100 Watts and a Wire podcast. The Isotron is a strange looking and compact antenna that has reviews with an overall rating of 4 stars on eham.net. After building and then testing the antenna for a month, I was invited to participate in the podcast along with two other hams to give our review of the antenna for the following criteria:
You can listen to the podcast here. In addition to the audio podcast, there are videos covering each of the review criteria on the 100 Watts and a Wire YouTube channel. (Each of the criteria listed above includes a link to the YouTube video for that topic.)
Assembling the Antenna
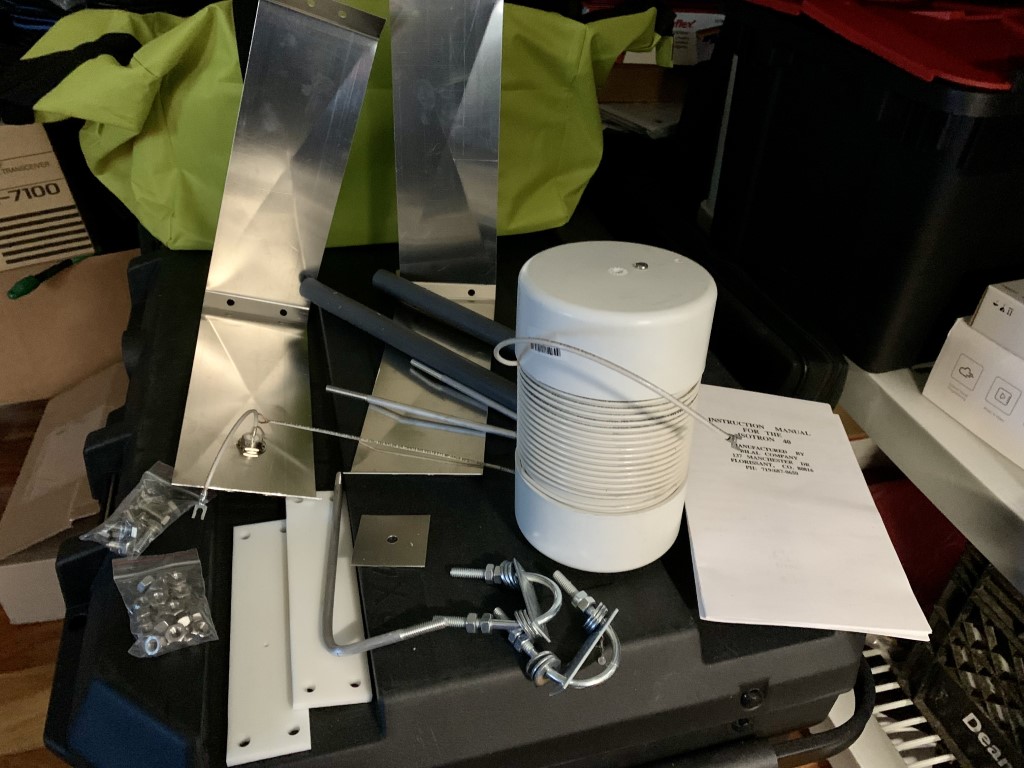
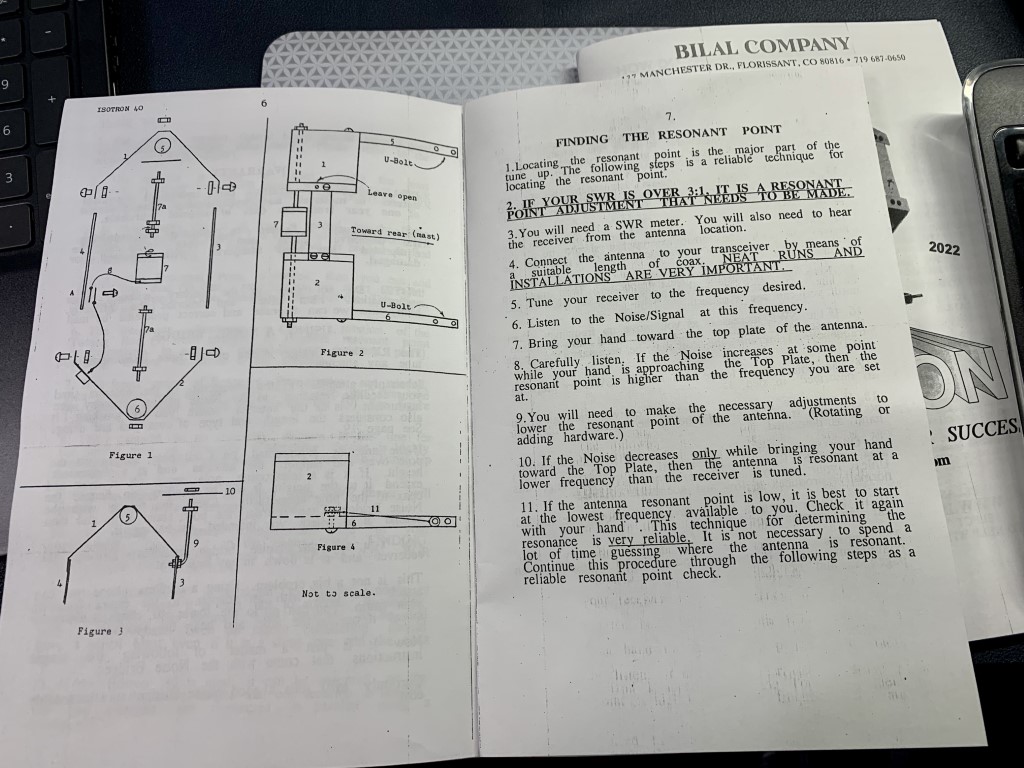
The antenna arrived in a sturdy box, and all of the parts were in good shape. The paper manual is adequate and includes diagrams that were helpful for assembly. It took me about an hour to put it together. Once assembled and tightened, it is a sturdy antenna. It’s worth reading the manual closely before attempting assembly, and again afterwards to understand the instructions for tuning the SWR.
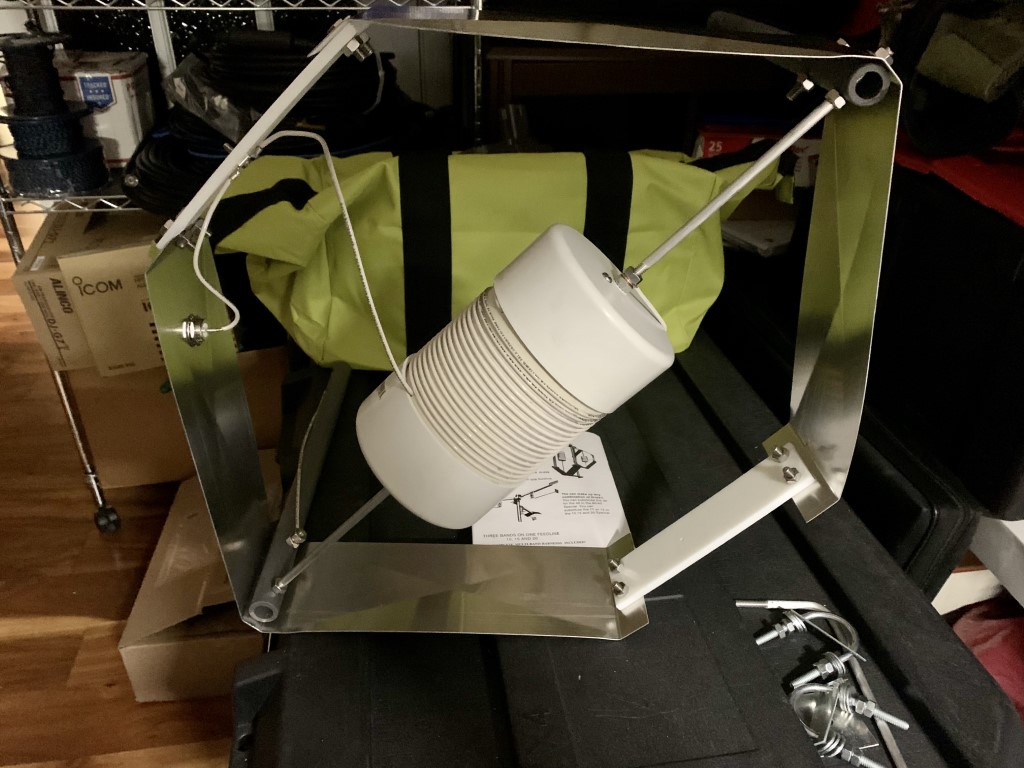
Photo of all parts prior to assembling the antennaThe manual is not fancy, but includes good instructions to assemble the antenna. Pay close attention to the instructions for tuning the antenna.The antenna is almost fully assembled, with the U-bolts for the mast and tuning arm still to be installed.
Installing and Testing the Antenna
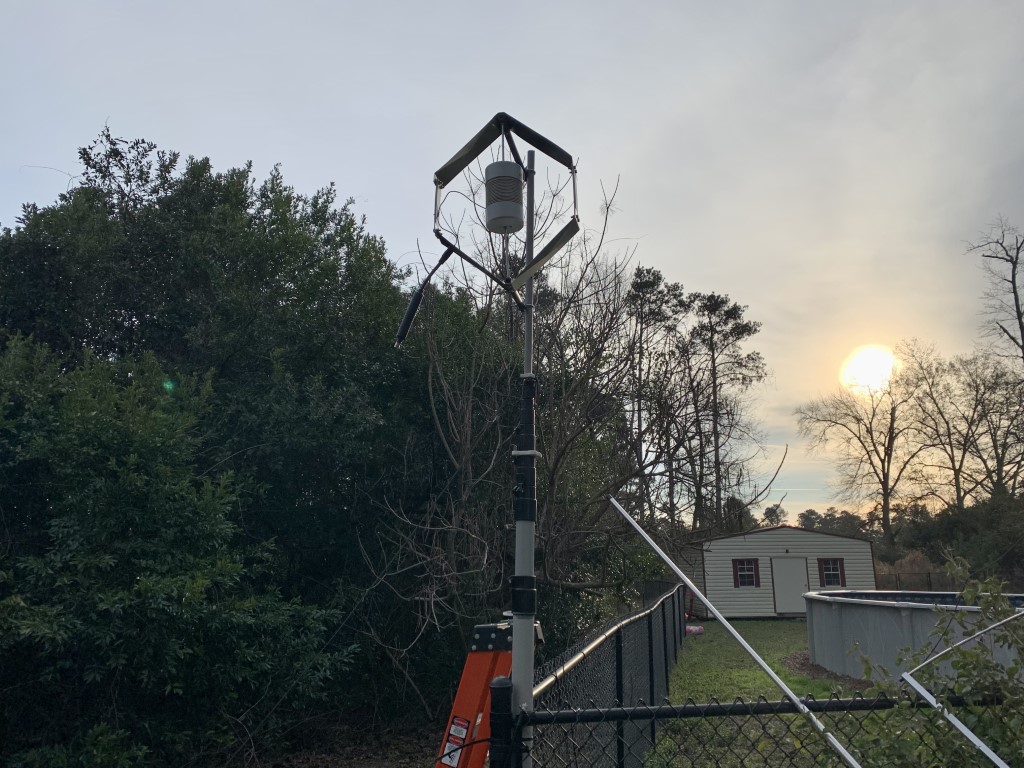
I installed the antenna on 28-foot heavy duty fiberglass telescoping mast from Max Gain Systems. The mast is located next to a long chain link fence, which may have interacted with the antenna and made tuning it a bit challenging initially. Once attached to the mast, I used a Comet antenna analyzer, and attempted to tune the antenna for the lower end of 40 meters for CW and digital modes. For my first test, with the antenna mast lowered, the SWR was just above 3:1. I believe that was partially due to close proximity of the metal fence. Also, the manual specifies that the antenna works best with a metal mast, likely to serve as a counterpoise. I attached about 25 feet of copper wire to the antenna ground as a counterpoise, and made some more tuning adjustments. After that, and when I raised the antenna to 25 feet, the SWR was down to 1.6:1. Close enough, since I have an antenna tuner in the shack.
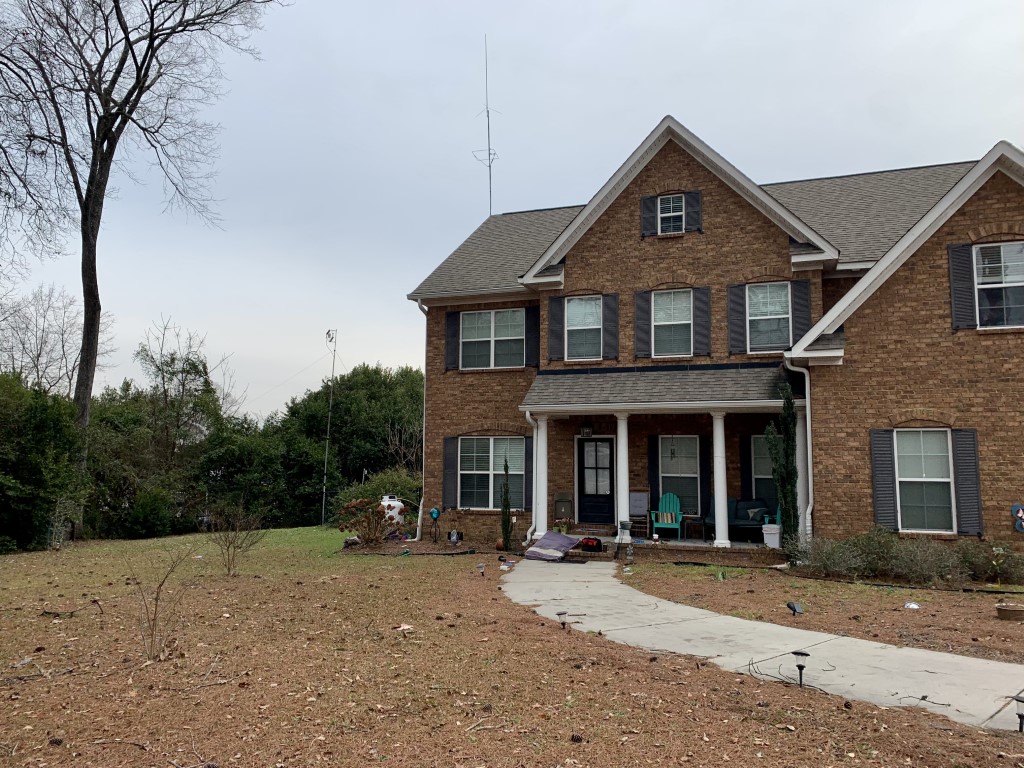
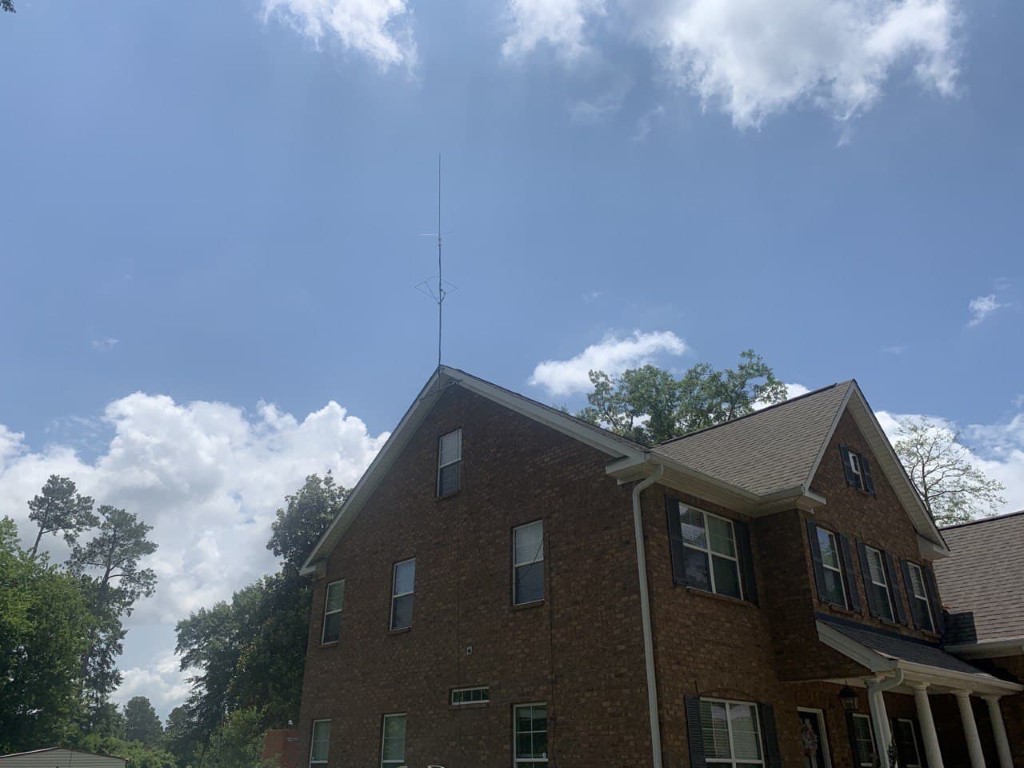
I mounted the antenna on a HD fiberglass telescoping mast. The mast was lowered to mount and tune the antenna. This picture shows a HF choke at the feed point, which I ended up removing after testing.The mast extended with the antenna about 25 feet off the ground.From a distance, the antenna is not quite as noticeable as the roof-mounted VHF/UHF vertical and 6M horizontal loop antennas.
Performance
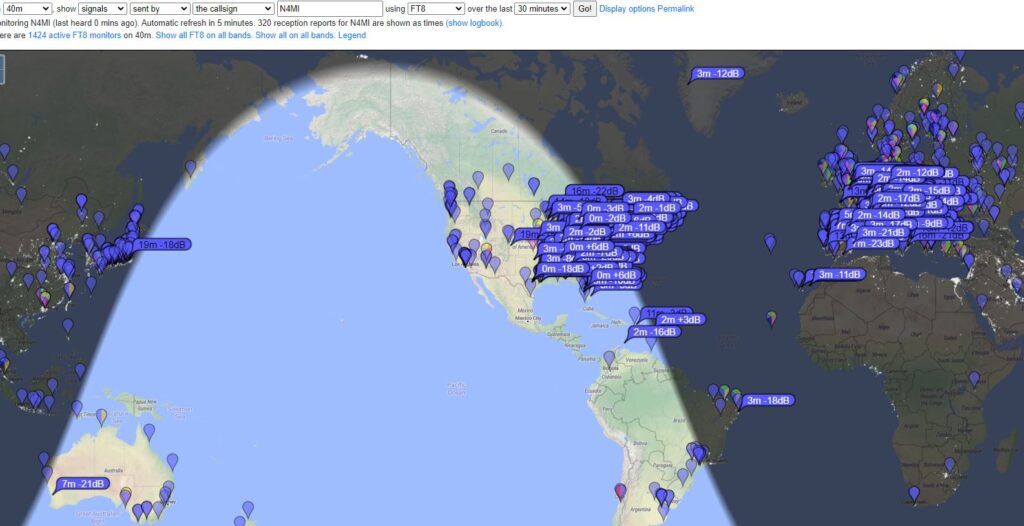
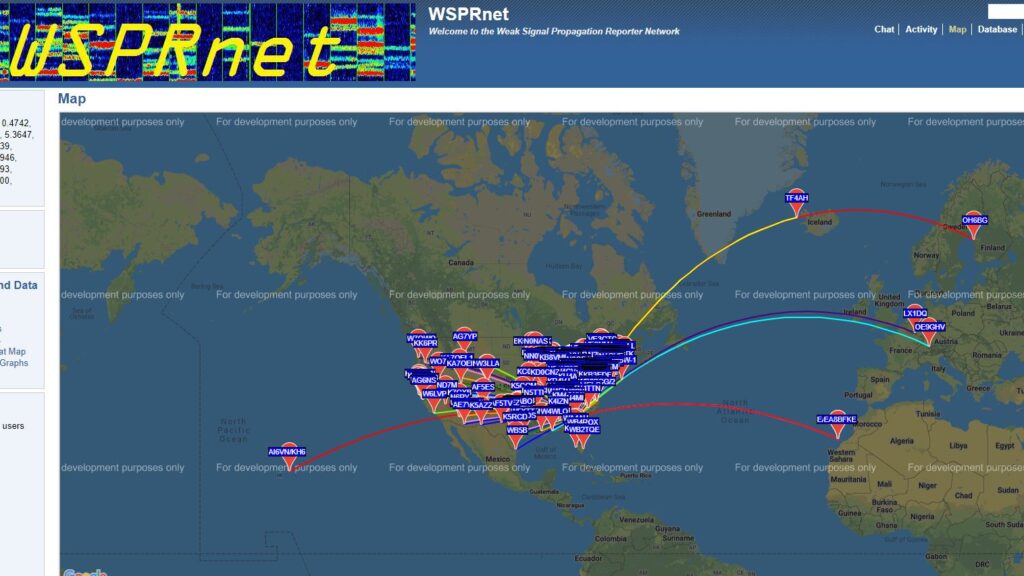
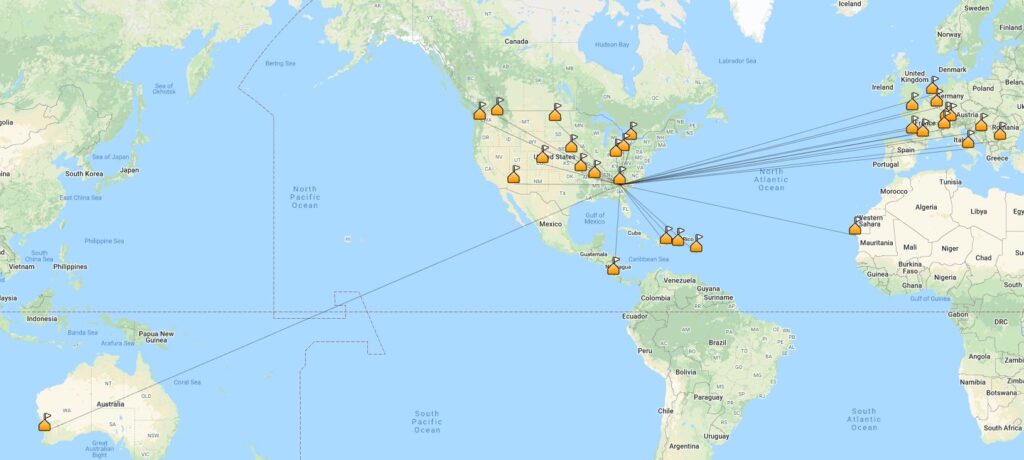
I tested the antenna for 30 days using FT8, WSPR, CW and SSB. The first contact I made on FT8 was in Washington State… a very promising start! Using FT8, I was easily able to work stations all over North America, as well as some DX stations in Europe, Australia and Japan. I also tested the antenna using WSPR for 24 hours, and my signals were received across North America and in Europe. I used the antenna for all of my 40 meter phone and CW contacts during Winter Field Day, and I was able to make a lot of contacts across the U.S. and Canada. The antenna performs better than I expected it would. However, it is not a good for receiving when compared against my end-fed halfwave antenna. I made comparisons several days, and the wire antenna was always noticeably better for receiving.
Stations receiving FT8 signals from Isotron 40M antenna on January 19th, 202224 hour WSPR test with Isotron 40M antennaCompleted QSOs made with the Isotron 40M antenna as of January 20th, 2022
Final Thoughts
Pros: 1. It actually works! When I first looked at the antenna, I was skeptical. After testing it for 30 days, I realize there are some use cases where this antenna is a good choice. 2. This antenna would probably good for someone with HOA restrictions, as it is small enough to be hidden. However, keep in mind that my testing was with the antenna mounted at 25 feet and in the clear. 3. Because the antenna is compact and can be raised quickly, it would also be a good choice for portable operations or emergency communications. Cons: 1. The antenna is only for the 40 meter band. If you have space for several antennas, that’s probably not an issue. 2. The antenna can be somewhat finicky with SWR. It made several trips up and down a ladder, and lowered the mast a few times, to get it adjusted. I also had to retune the antenna after one particularly cold, windy, rainy day.
The antenna retails for $160. Would I have bought this antenna on my own? Probably not. During the podcast, each reviewer was asked to give a “signal report” between 55 and 59 as an overall rating of the antenna. My report was solidly in the middle with a 57. It is definitely strange looking, but the appearance and compact size belie an antenna that actually performs fairly well, as long as you don’t expect miracles. I will most likely take the antenna down from the mast to install an off-center-fed dipole, and see if one of my ham friends living in a HOA community would like to give the Isotron a try.
This was a great ham radio experience for me. I had a lot of fun building, testing and using the antenna. I also enjoyed being included on the 100 Watts and a Wire podcast, and Christian Cudnick, K0STH, is a great host.
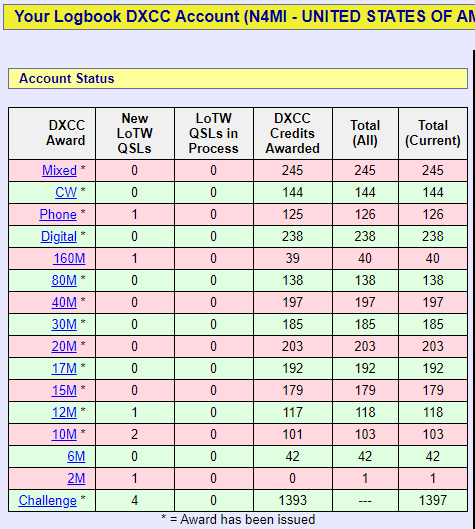
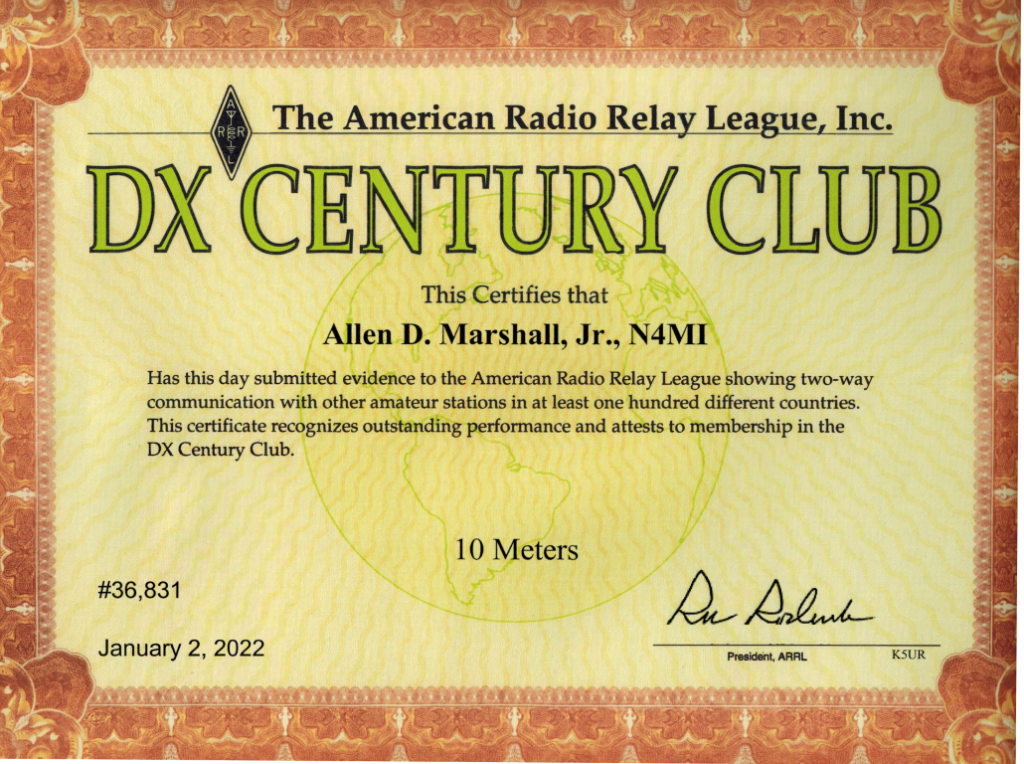
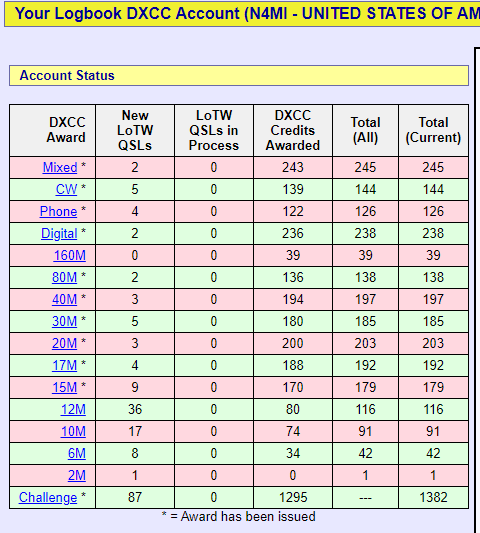
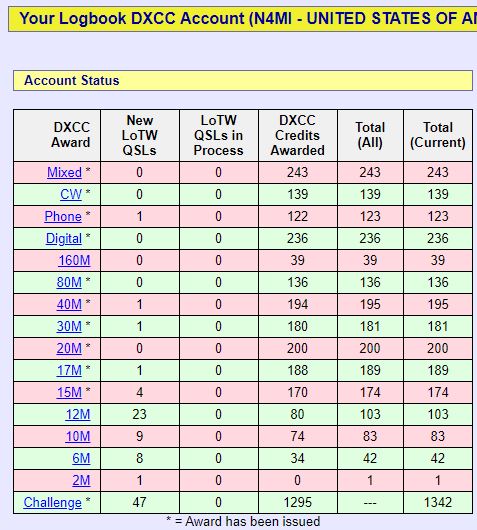
The conditions on 10 meters have finally become favorable for me to get enough confirmations to complete WAS and DXCC on that band, and those were also what I needed to complete 5BWAS and 5BDXCC. I received the 5BWAS certificate, and applied for the 5BDXCC certificate. I also have WAS and DXCC on 30M, 17M and 12M. All of these were completed using 100 watts and omnidirectional antennas. The key has been persistence, and some luck to be on the radio when the bands are open.
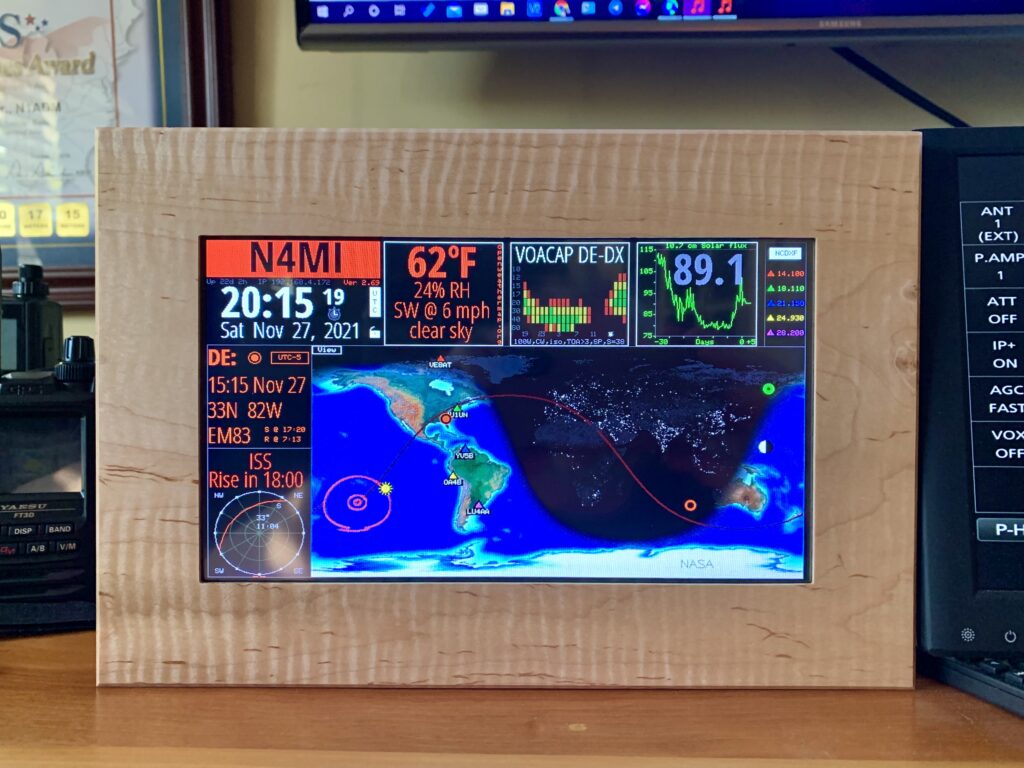
I purchased a Veritium HFClock as an impulse buy when I saw it on sale in an email from Gigaparts. I tried to build a HamClock using a Raspberry Pi and 7″ touchscreen, but I could never quite get it to work correctly. The Veritium HFClock is far more expensive, but it has a 9″ touchscreen in an attractive hardwood frame, and was easy to configure right out of the box. It’s definitely an attractive and informative station accessory. I may try again to build a HFClock with a Raspberry Pi someday.
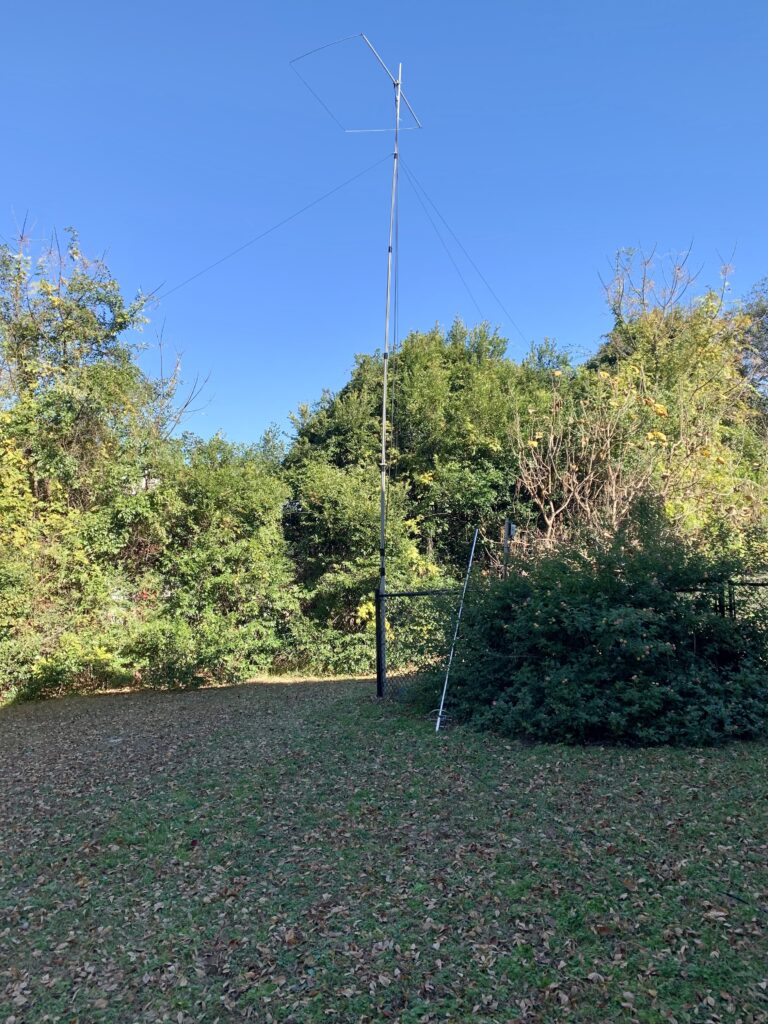
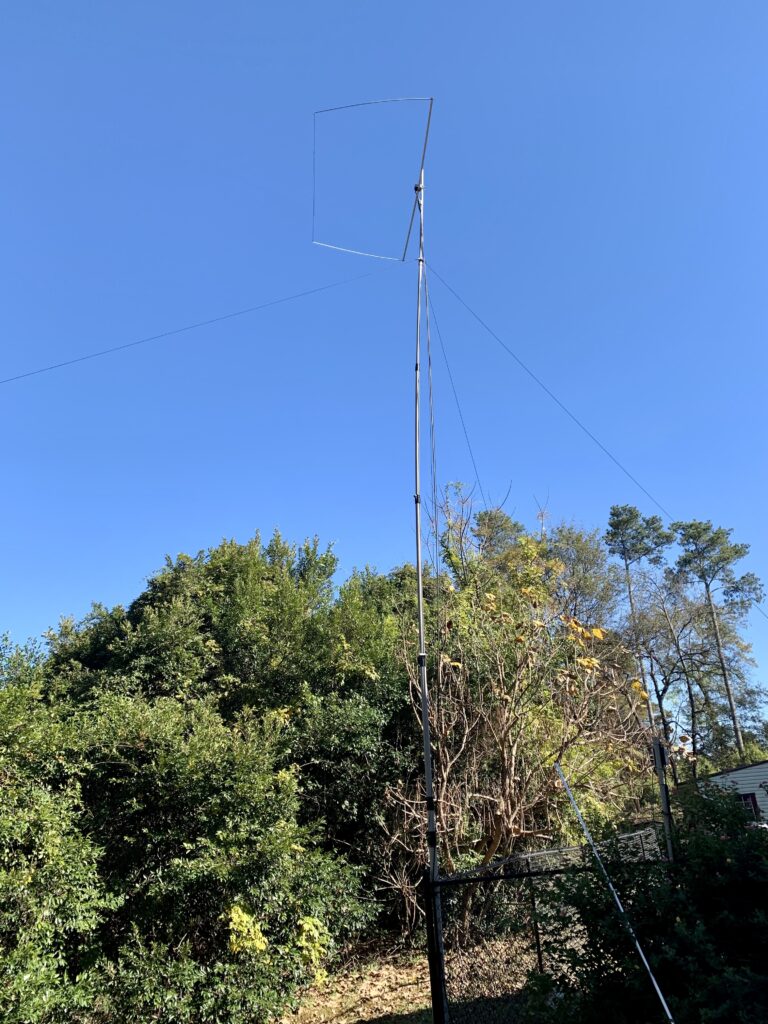
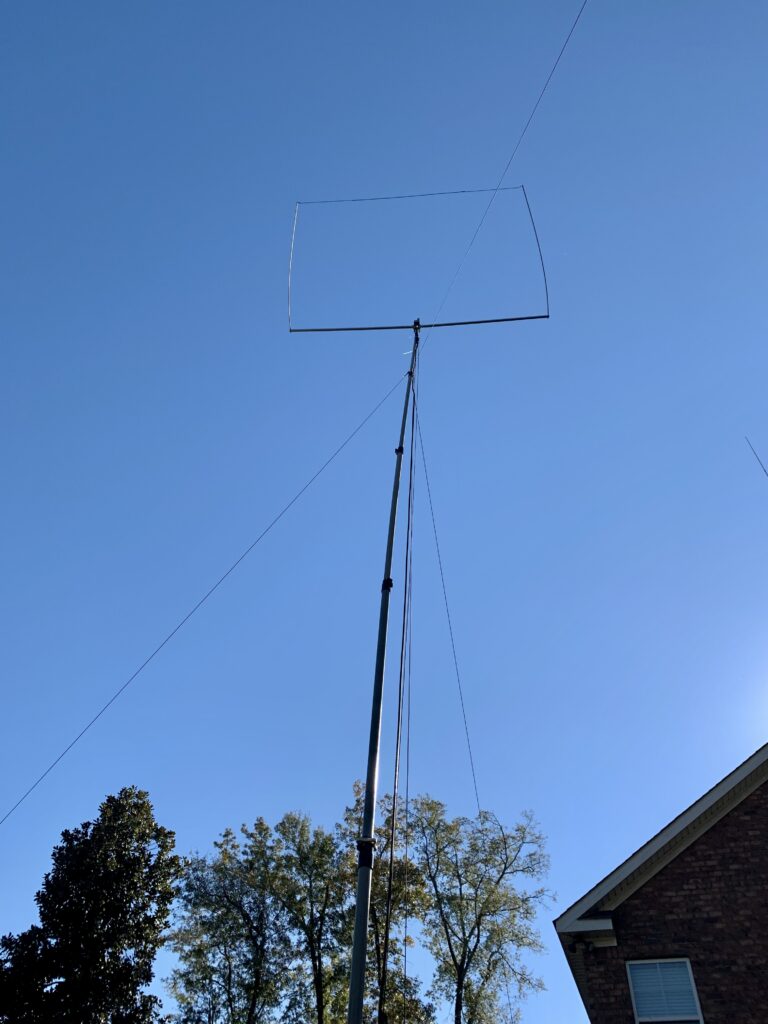
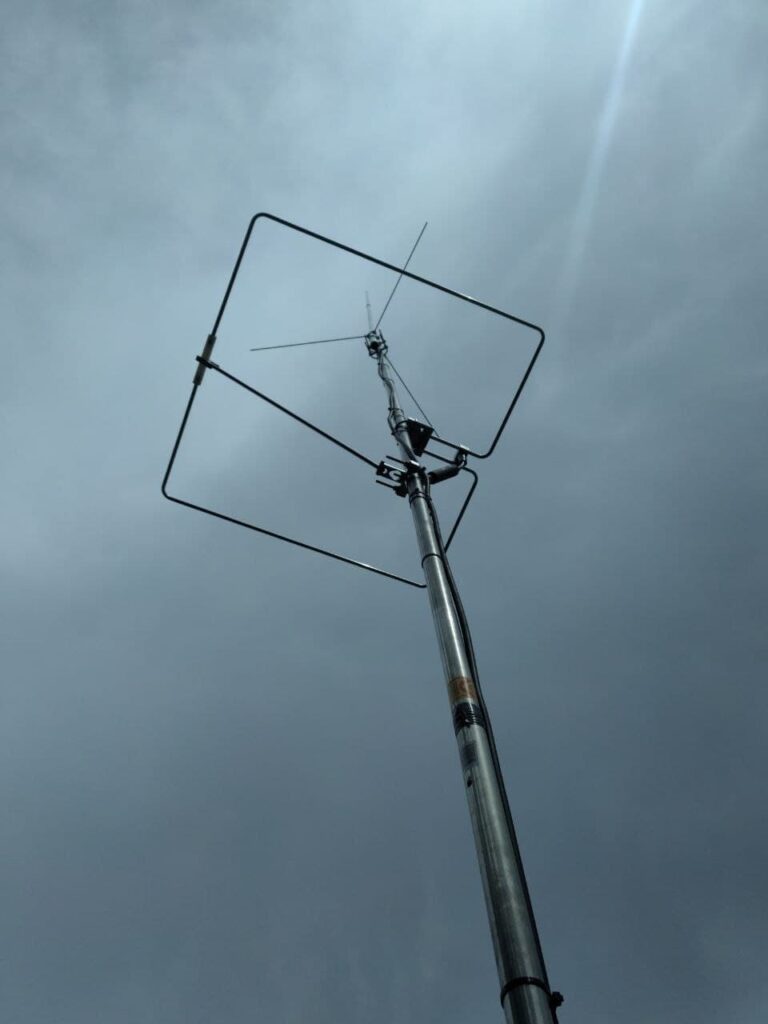
This afternoon I installed a new antenna for 10 meters. The antenna is a HF-28 Rectangle from PAR Electronics. It’s light (2.5 lbs.) and compact (approximately 8′ X 4′). It was very easy to build and took me about a half hour following the included instructions. I have the antenna mounted on a Max-Gain Systems MK-6 fiberglass push-up mast. The SWR was near perfect right away, but there are instructions included to tune the antenna if necessary. According to the manufacturer, the antenna is not perfectly omni-directional, but it has a pattern that does not require a rotator.
The antenna seems to work very well. The conditions on 10 meters were not great today, but right away I was able to work several FT8 stations on the west coast and in South America. I can’t wait to see how it performs in good band conditions. Hopefully this antenna will help me finally work Alaska on 10 meters to finally complete a 5BWAS and get closer 10 DXCC for 10 meters!
The antenna is mounted on the mast I had previously used for a 6 meter Ringo vertical, which you can see leaning up against the fence.I still need to do some work on the guy ropes, but the antenna and mast are very sturdy.I only need 9 more countries for DXCC on 10 meters!
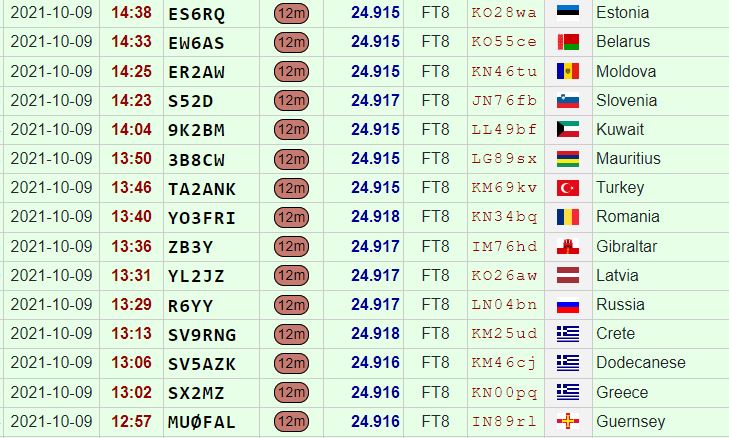
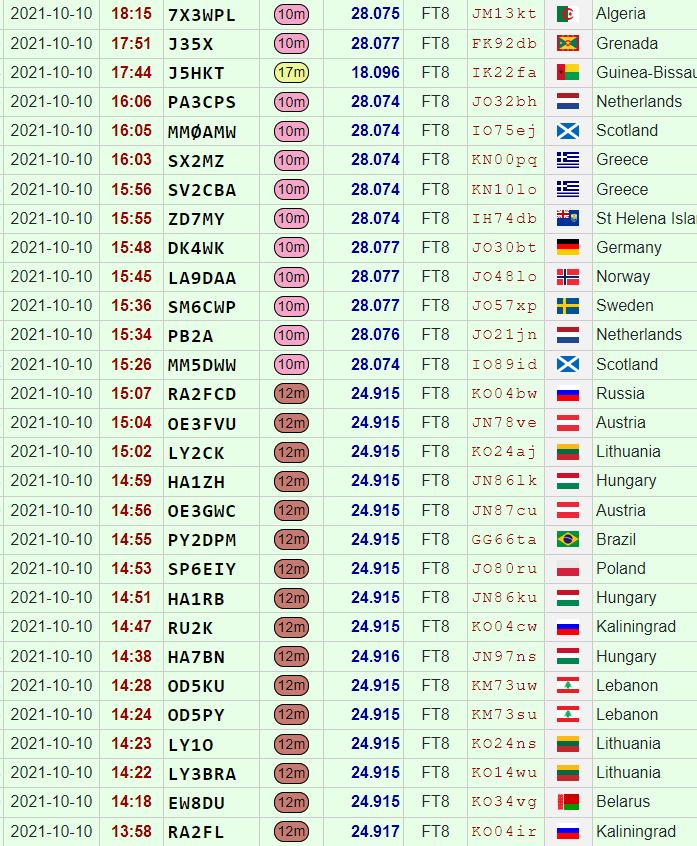
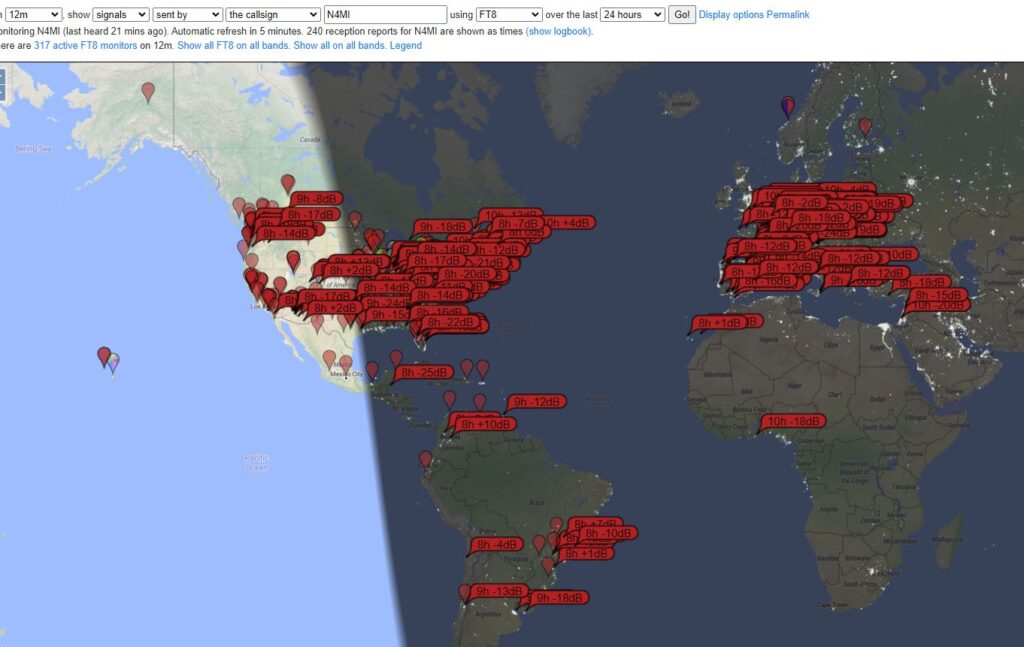
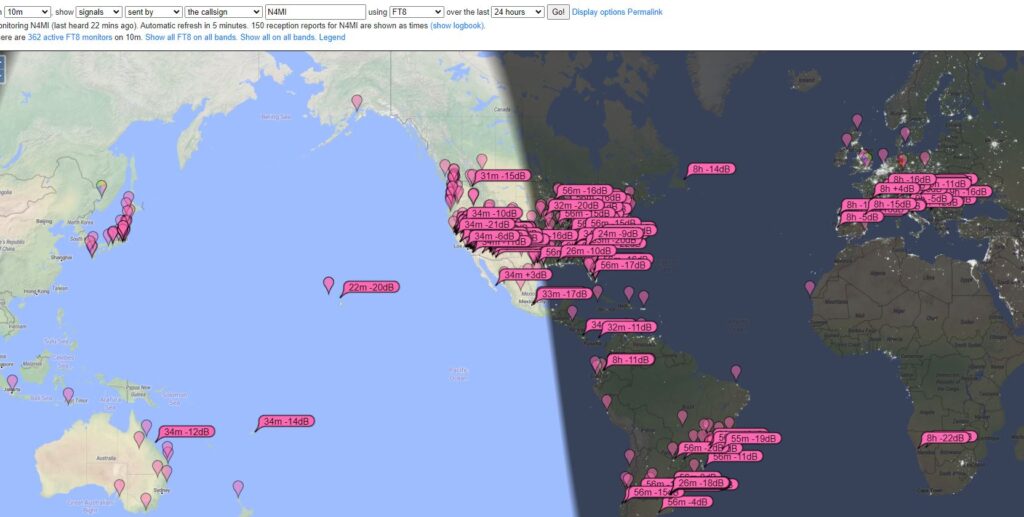
This weekend the higher frequency bands have really come to life. I have had a blast working stations in Europe, the Middle East, and Africa. I hope this is just a glimpse of things to come!
My 12m contacts on October 9th12m and 10m contacts on October 10th12m and 10m contacts on October 11thMap of stations that were receiving N4MI FT8 signals on 12m on October 11th Map of stations that were receiving N4MI FT8 signals on 10m on October 11th Logbook of the World confirmations as of October 11th
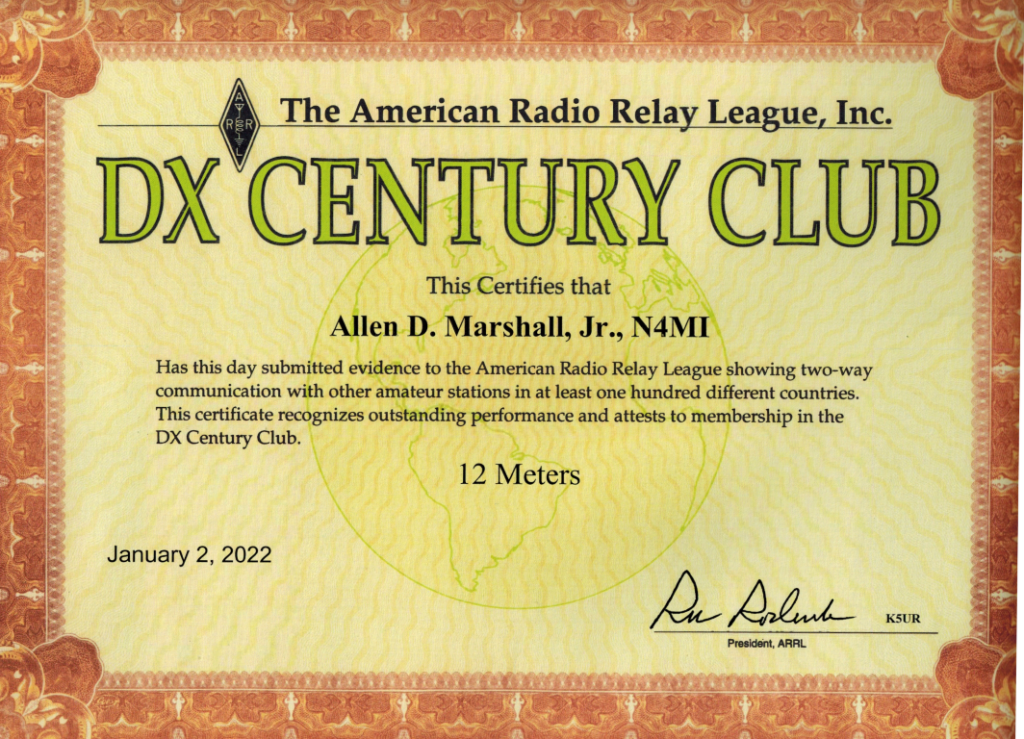
In three days, I logged 40 QSOs on 12m, in 29 different countries. I also logged 19 QSOs on 10m, in 17 different countries. I could have worked many more stations, but I was hunting specifically for new countries. I managed to work enough new countries for a DXCC Award for 12m. I still have some work to do on 10m, but I picked up a few more.
I am sure that many hams in the U.S. with better stations worked more countries, but I am happy with these results using less than 100 watts into an end-fed wire antenna.
I wanted to incorporate some of my most recent ham radio activities into a new QSL card. I reached out to my friend Jeff, K1NSS, and gave him a basic idea about what I wanted. I wanted my DX hound buddy Luke the Catahoula featured in the card. As usual, he worked his magic and came up with a fantastic design that captured my vision, and then some! What do you think? This version will be going to the printer soon.
My faithful old 2011 Tundra pickup truck, as great as it was, was starting to require frequent repairs. I got a great trade-in offer for it, so I got a new Dodge 1500 Crew Cab. A new truck means time to install a new radio! My good friends Rusty KG4HIR, Randall KN4FYG, and Steven KN4RVU offered their expertise, time and sweat to help me install the radio. They’ve all had experience with mobile radio installation, but this was my first time.
In my Tundra, I had an Icom ID-5100A, and I had a Kenwood TM-D170GA in my shack. It seemed like a no-brainer to mount the Kenwood radio in the new truck to take advantage of the APRS capabilities, which are not really needed in the shack. So, the ID-5100A from my old truck was moved into the shack, and the TM-D710GA was designated for the new truck.
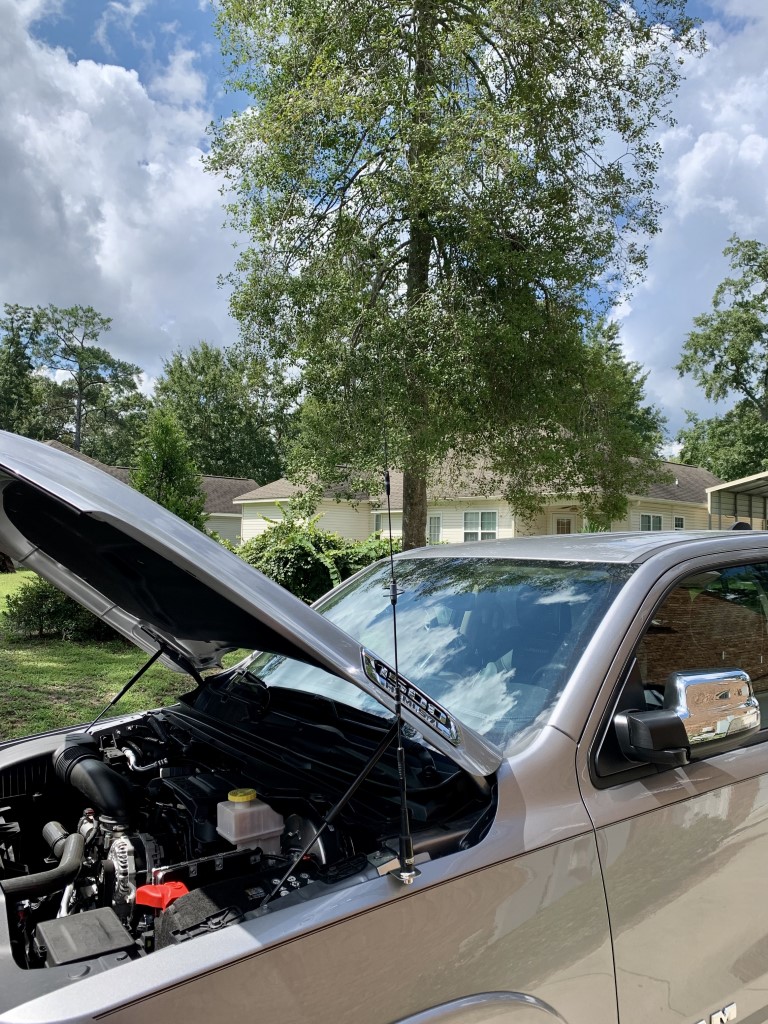
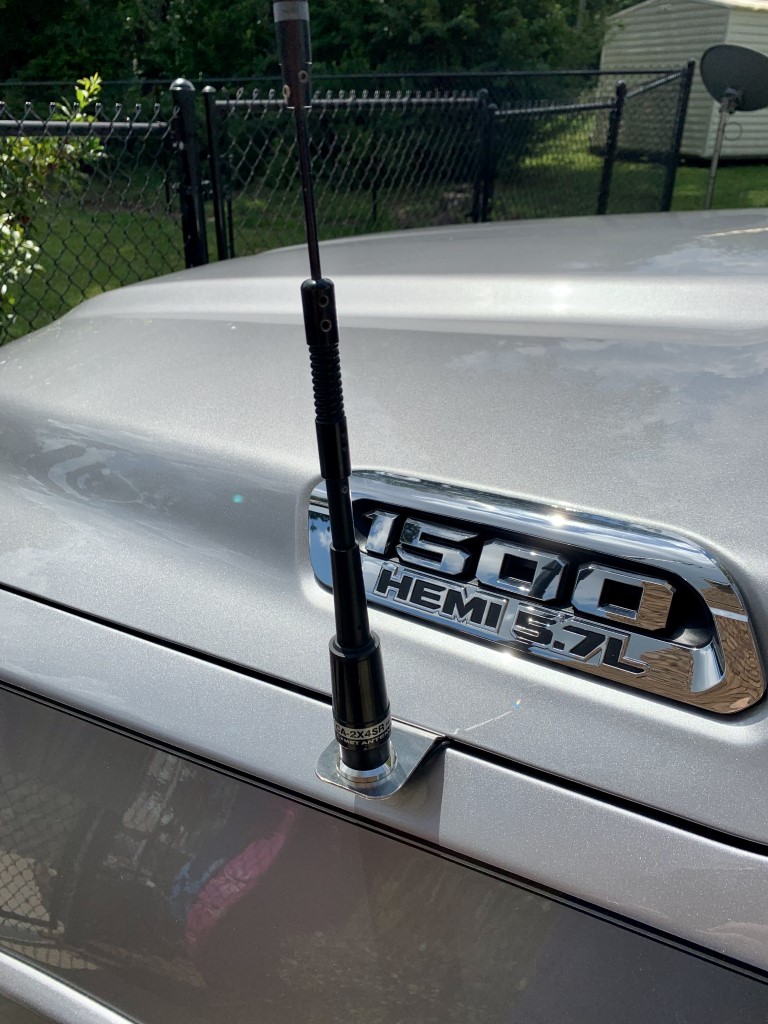
New Ram 1500 pickup with dual band antenna installed on a fender mount.
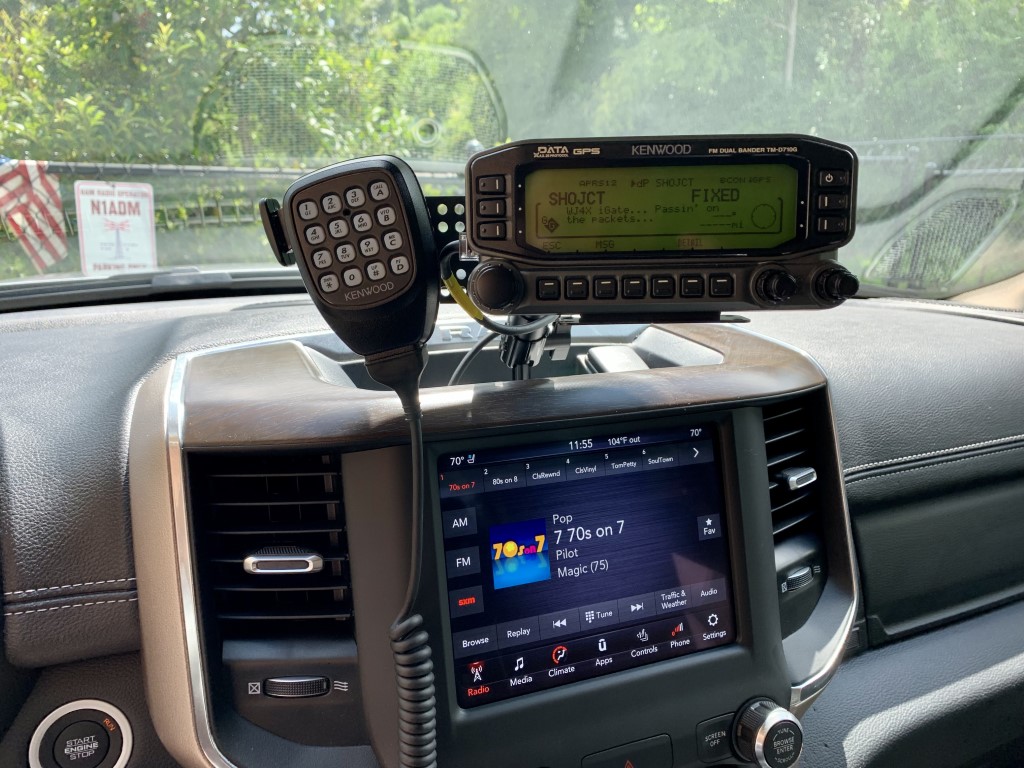
Rusty gave me some good advice, which is to get used to the layout of the new truck before deciding how and where to mount the radio. I did not want to drill too many holes in the new truck, so I decided to go with a fender mount for the antenna. I got an antenna mount, specifically designed for the Ram 1500, from Valley Enterprises. The main unit of the radio is mounted with a bracket under a back seat. After some research, I chose a center dash mount from ProClips, and an extension plate with magnetic puck from Lido Radio for the head unit. The dash mount is very sturdy and well designed. The magnetic puck on the extension plate is very convenient for the microphone.
The install went very well. It was a hot and humid morning, but the awesome install crew got the job done in about 3 hours. All of the truck parts went back in place, with no extra or missing pieces, and the radio powered right up. The way everything is mounted makes it very easy to install a new radio, if that’s ever necessary.
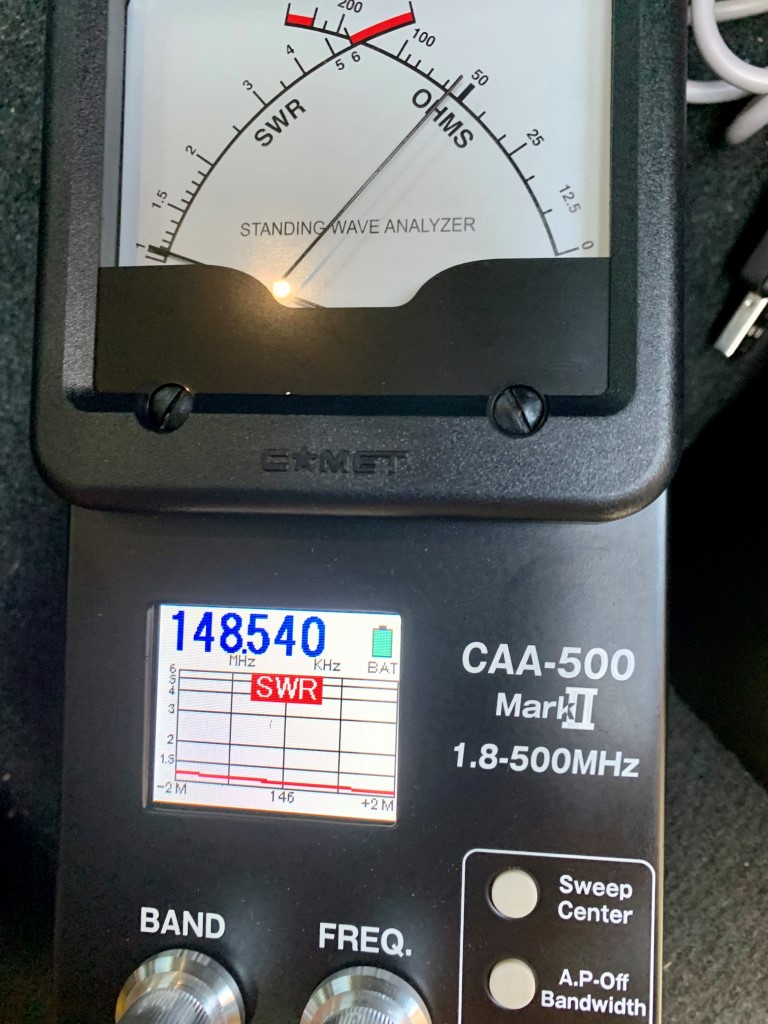
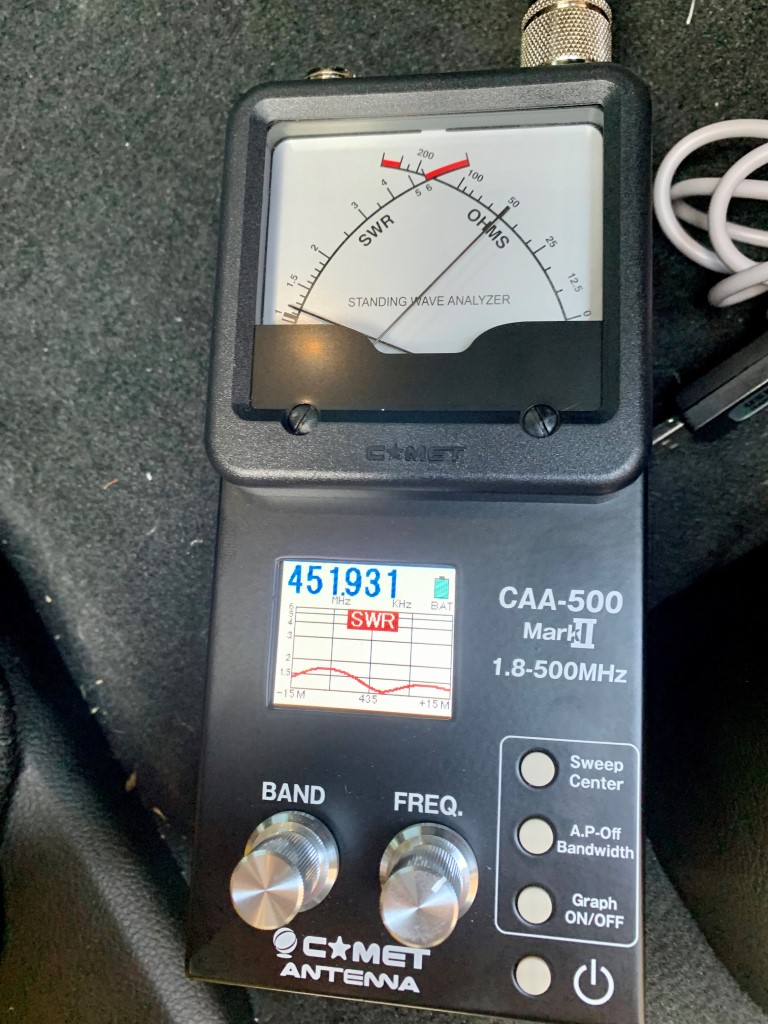
The radio had previously been programmed for use in the shack, but we were able to verify that it was transmitting and receiving. Later, I reprogrammed the radio and adjusted all of the settings for mobile use. I also did some test drives to see how the radio performed with the local repeaters, and simplex with a few friends. It seems to perform as good as I would expect with a fender-mounted antenna. I also have it transmitting APRS beacons as N4MI-9.
I am very pleased with the radio and how it is installed! It’s great to be on the air again while I’m rolling.
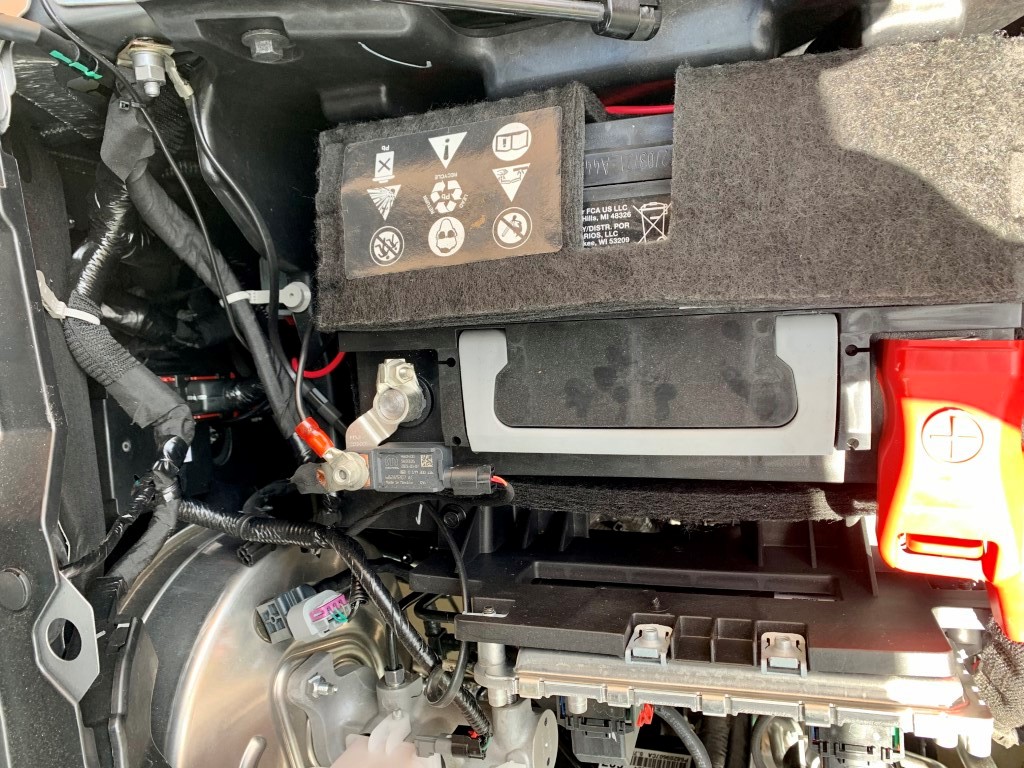
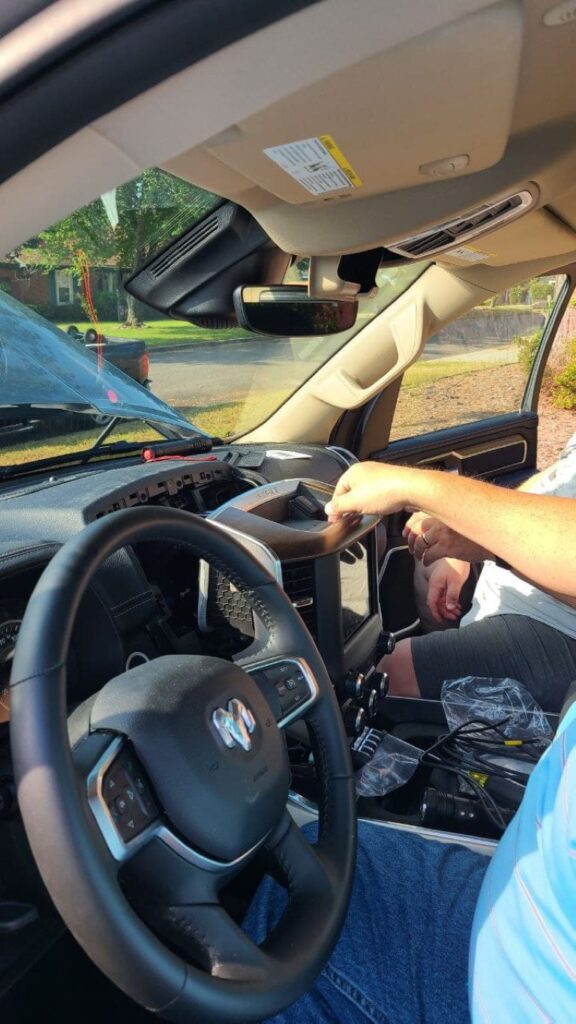
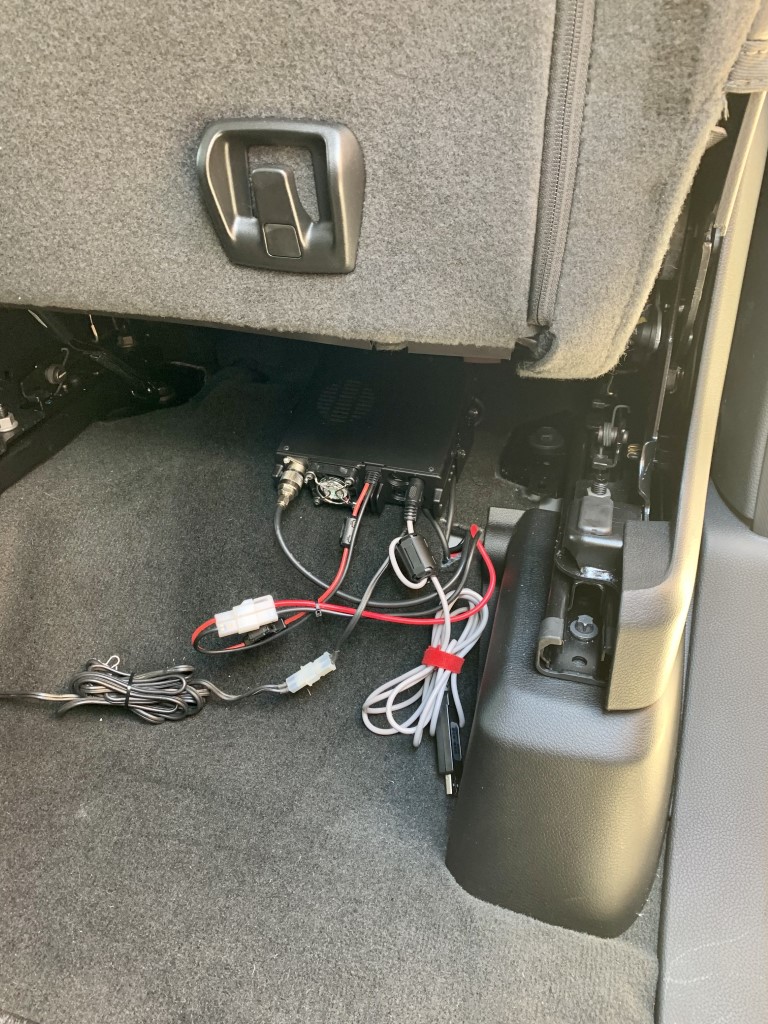
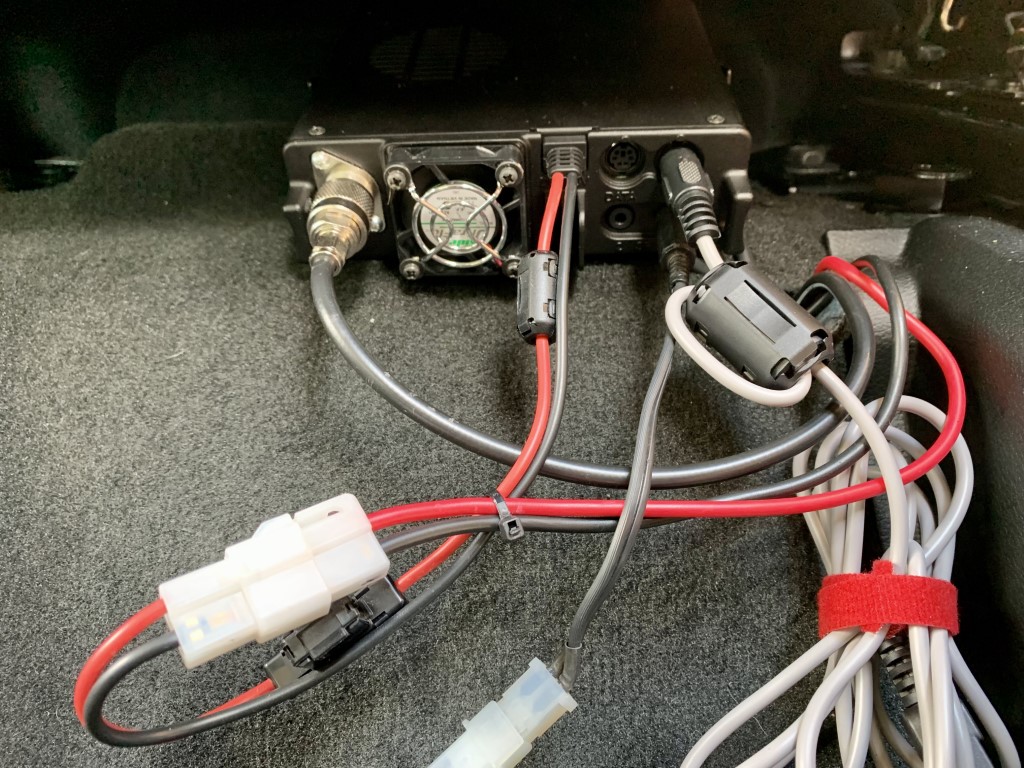
The power and antenna cables came through the firewall with some gentle persuasion, through an existing hole where other wires were routed from the cabin to the engine compartment.Did you know that the center entertainment console just pops out of place with a good tug? It’s held in place with two clips. It’s an uneasy feeling when pulling it loose! The cable from the radio to the remote head unit is routed behind the entertainment console.The main radio unit is mounted under a back seat. It’s mounted with the rear of the unit facing toward the cabin to improve airflow and allow easier access to the plugs and cables. I leave a programming cable plugged in.The drivers side fender mount came from Valley Enterprises. I am using a Comet CA-2X4SR dual band antenna, which is compact and very broad band across 2M and 70cm.Final installation of the head unit. The cable comes in behind the entertainment console. I used a ProClips mount center dash mount designed specifically for a Ram 1500, along with a Lido extension plate for the head unit and a magnetic puck for the microphone.The CA-2X4SR is either a great dummy load, or a well tuned antenna! You can follow my tracks on aprs.fi as N4MI-9
From the time I became licensed, just a little over 5 years ago, I have been using a trusty Diamond X50A antenna mounted on one 5-foot galvanized steel mast on an eave mount, putting the antenna about 4 feet above the roofline. The apex of the roof is approximately 30 feet from the ground. This antenna has served me very well, and with it I could reliably hit most of the repeaters in the area, as well as work stations on simplex up to about 15 miles away. Last year, I added a Cushcraft AR-6 Ringo for 6 meters. When there is a 6M opening, this antenna works OK and I worked quite a few distant stations (see previous posts under the category 6 Meters). However, because of the vertical polarization, I had difficulty working some stations in nearby grids who have horizontally polarized antennas. Also, the Ringo would frequently detune for mysterious reasons. Even though it was mounted on a telescoping mast, it became tiresome to frequently lower and retune it.
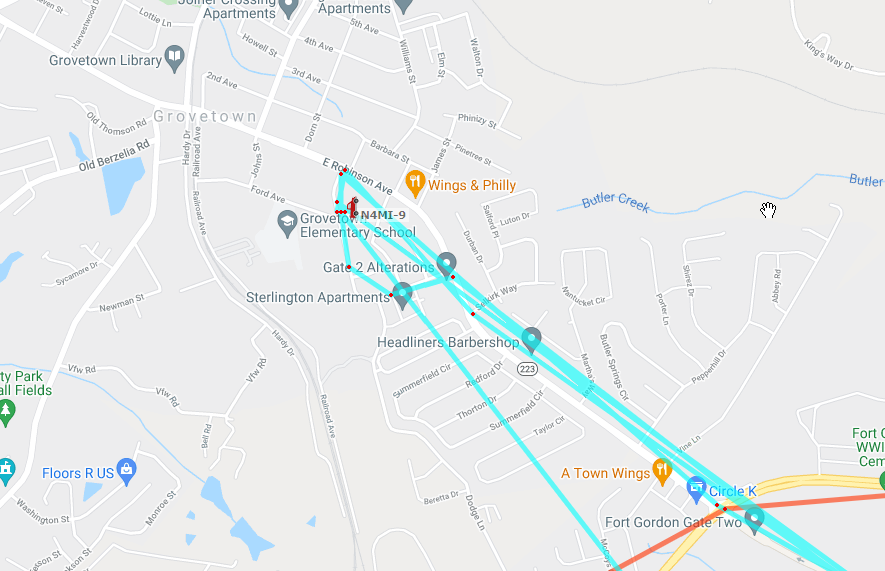
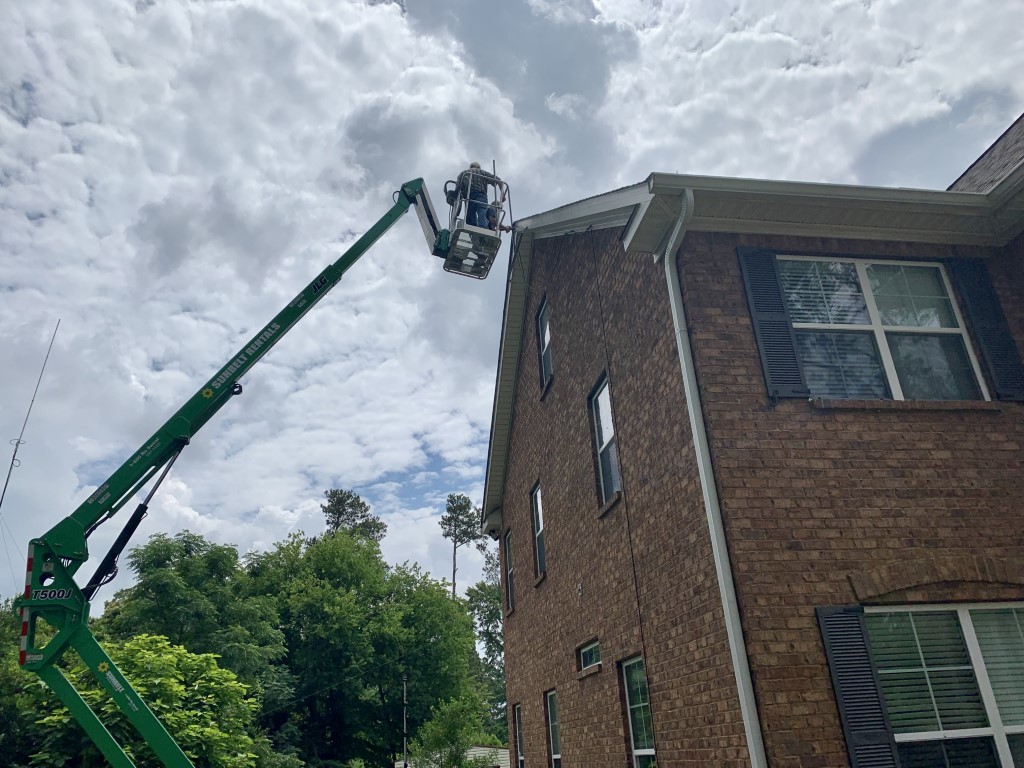
When my friend Rusty inquired about renting a 50-foot articulating boom lift to do some antenna work at his house, I thought now might be a good time to upgrade both antennas. I got a Diamond X300A for 2M/70cm, and a M2 HO Loop for 6M. I also got some new 5-foot galvanized masts and 55-feet of new RG-213 coax. My ham friends came over this morning to remove the existing antennas and install the two new antennas. Special thanks to KG4HIR Rusty, KG4HIQ Earl, W4EFS Walter, and KK4ZHT Eric for working all day on this project in the heat and humidity! Eric and Walter did all of the work in the bucket, and Rusty and Earl did the majority of assembly and adjustment of the antennas on the ground.
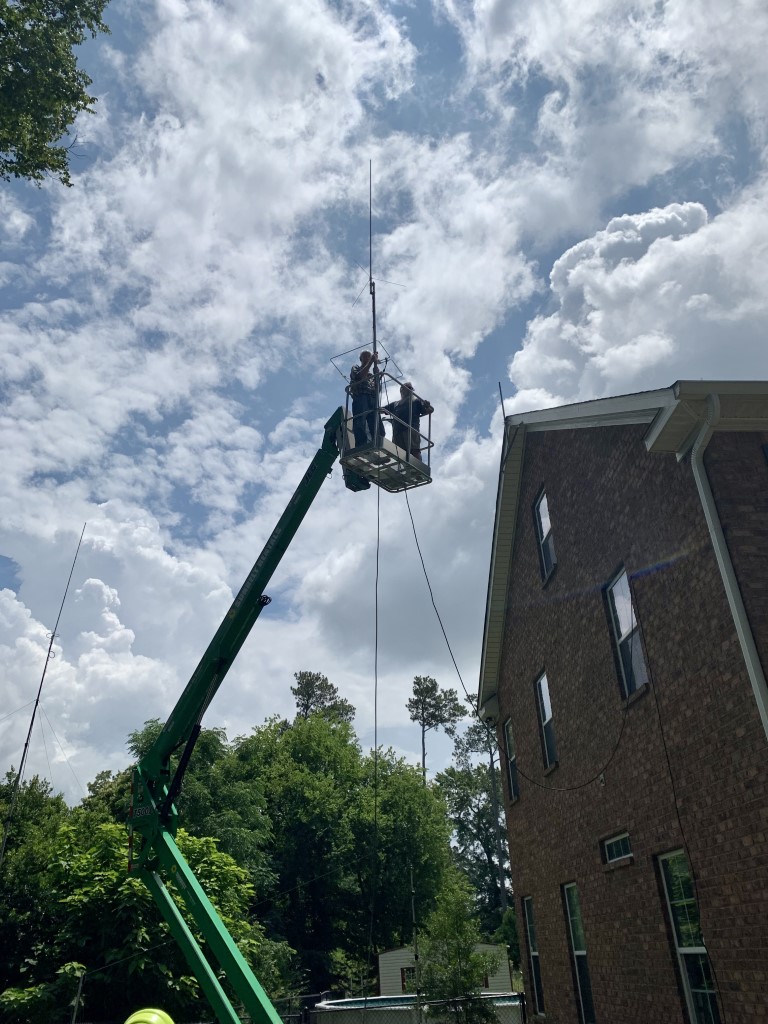
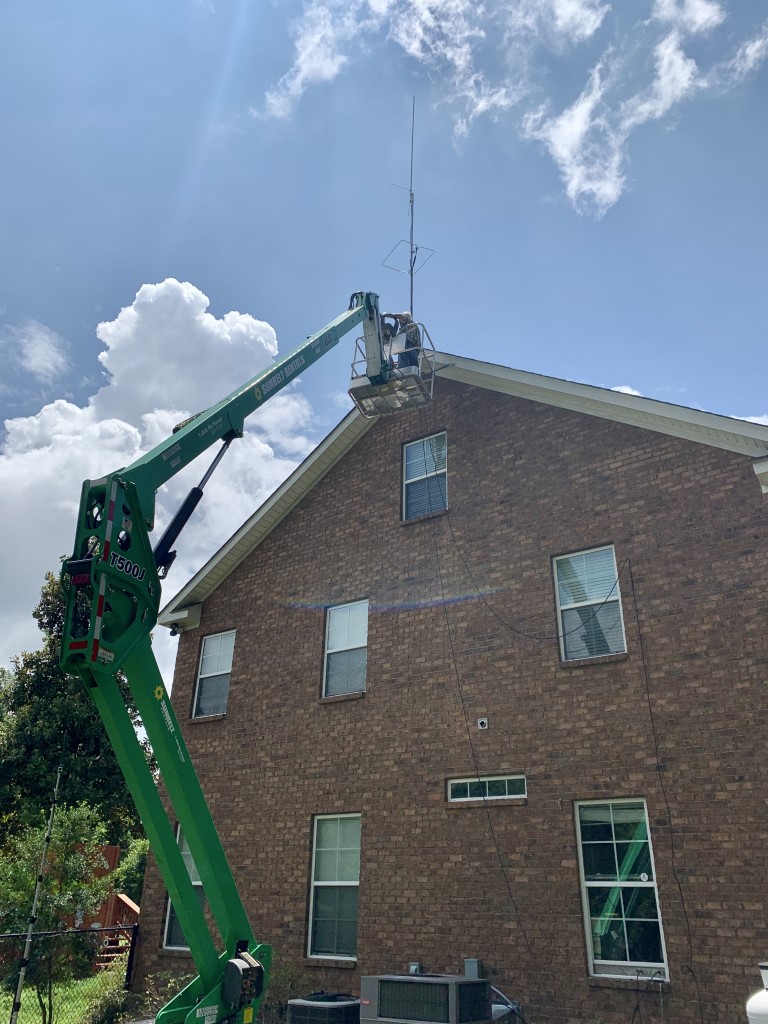
For this installation, we used three sections of 5-foot galvanized mast (for a total of 15 feet). Approximately 2 feet of the first section sits below the roof apex in the bottom of the eave mount, so about 13 feet of mast is above the rooftop. The X300A, which is a 10-foot antenna, is mounted on top, and the 6M horizontal loop is mounted about 5 feet below that. We used the existing LMR400 coax for 2M/70cm, and the new RG-213 coax for 6M. We tested the SWR and impedance on both antennas on temporary masts at about 15 feet above ground, and both antennas had great readings as assembled – no need for adjustments. I thought we might have to adjust the 6M antenna once it was in place above the roof, but the SWR stayed about the same at 1.2:1.
Eric and Walter preparing to remove the existing Diamond X50A and mast from the eave mount. You can also see the 6M Ringo vertical on the left side of this picture.The X50A and the old mast have been removed. Installing the first new mast section into the eave mount.Both new antennas were assembled and mounted to two mast sections on the ground. Eric and Walter preparing to place the two mast sections with the new antennas into the first mast section.All three masts and the two antennas are in place. Walter and Eric are adjusting and tightening all of the mounting hardware.The new masts and antennas in place.Looking up from the roof at the shiny new antennas.
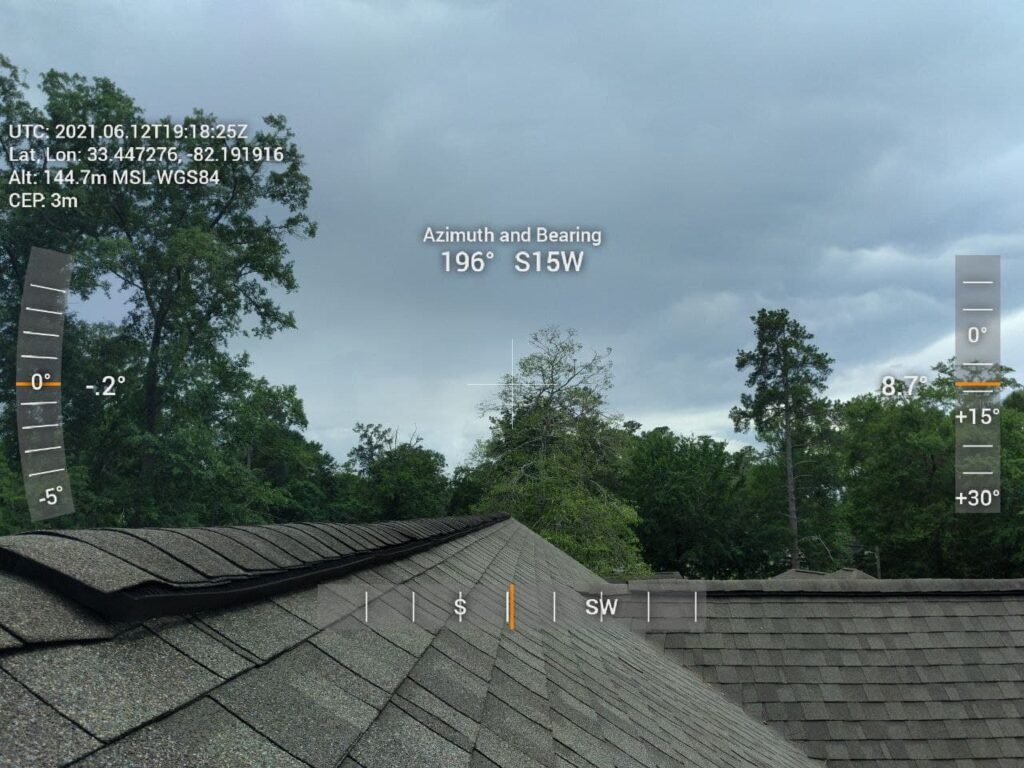
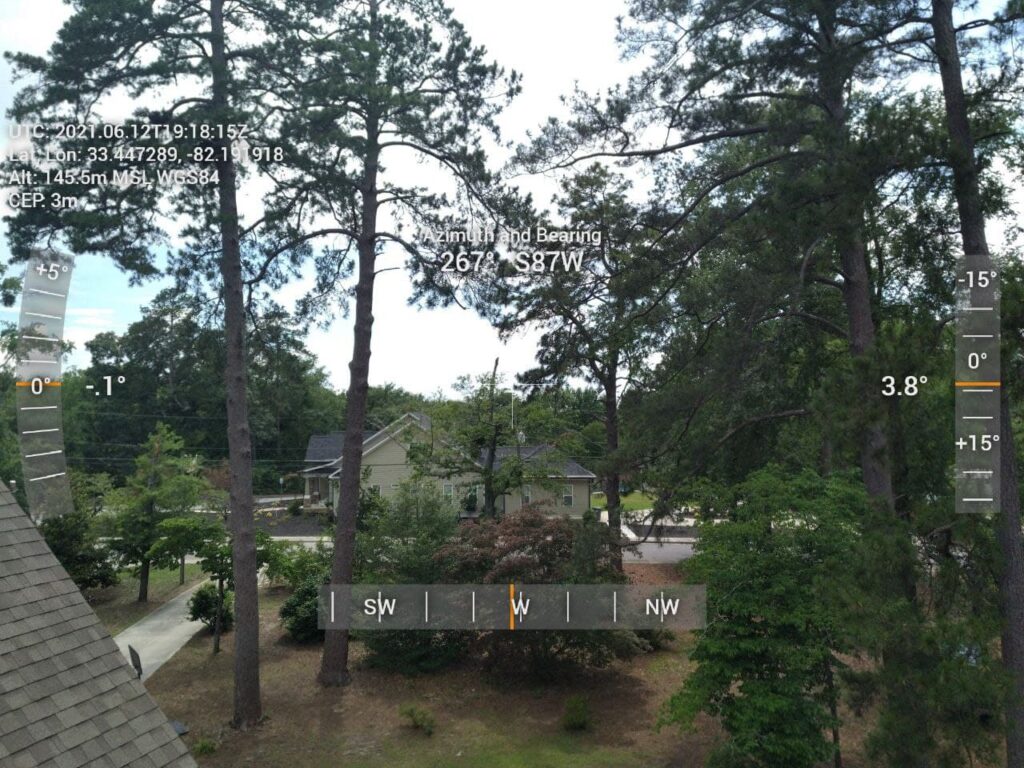
With the lift bucket extended, Eric took some photos that give an “antenna-eye” view from the rooftop.
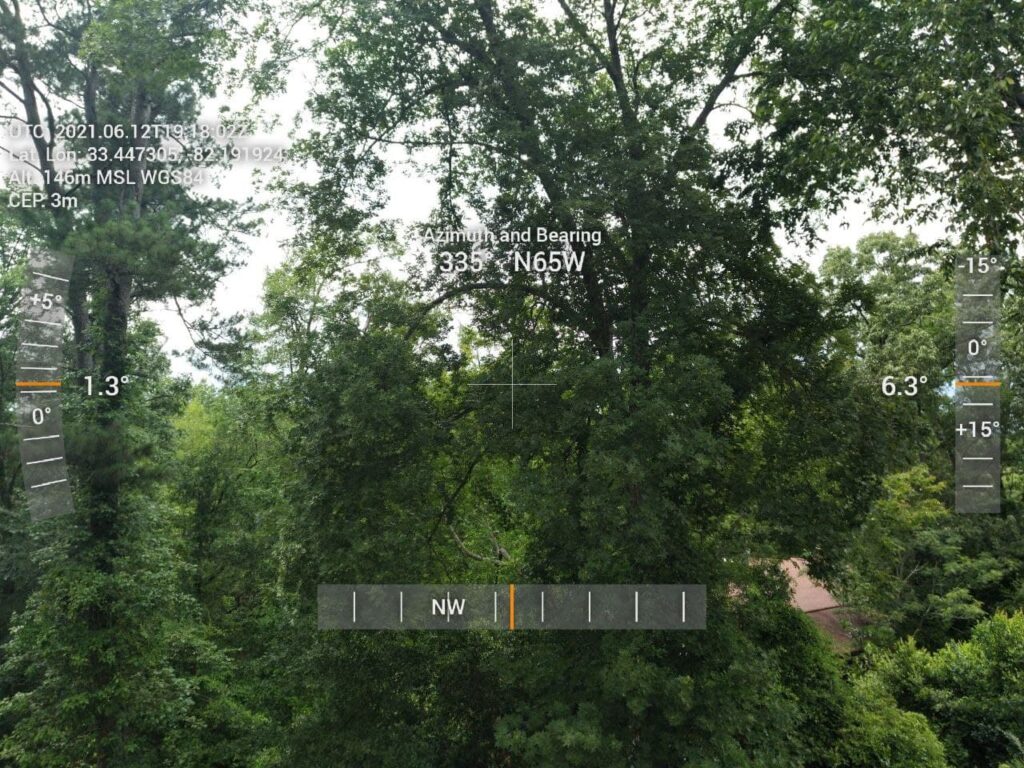
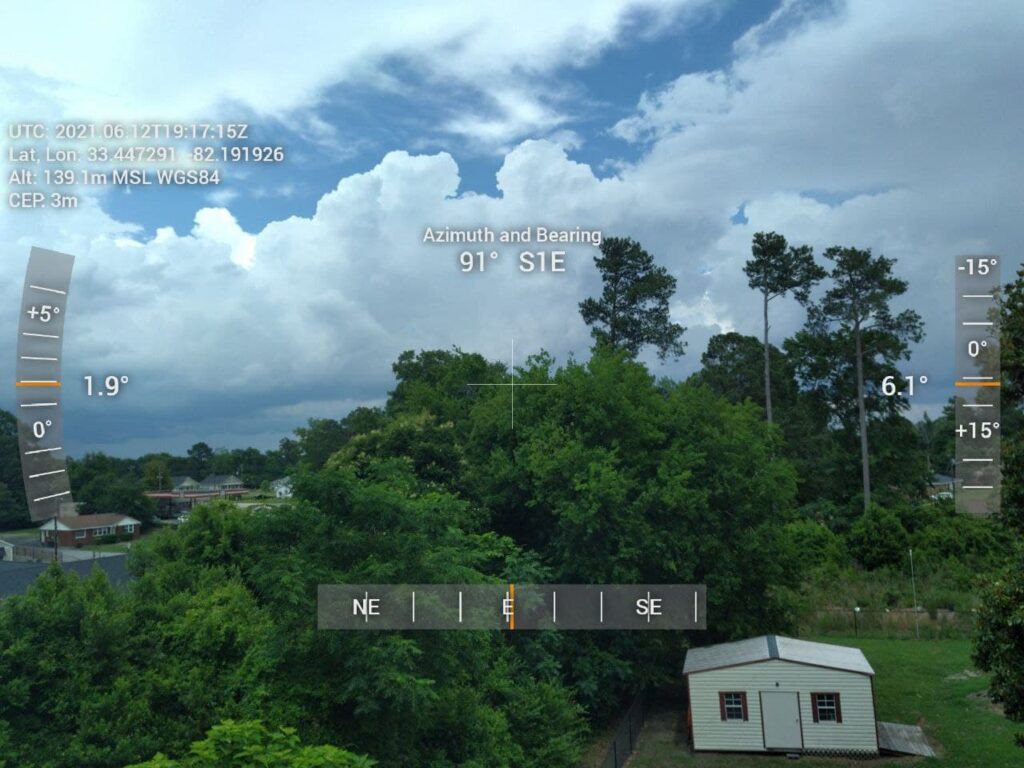
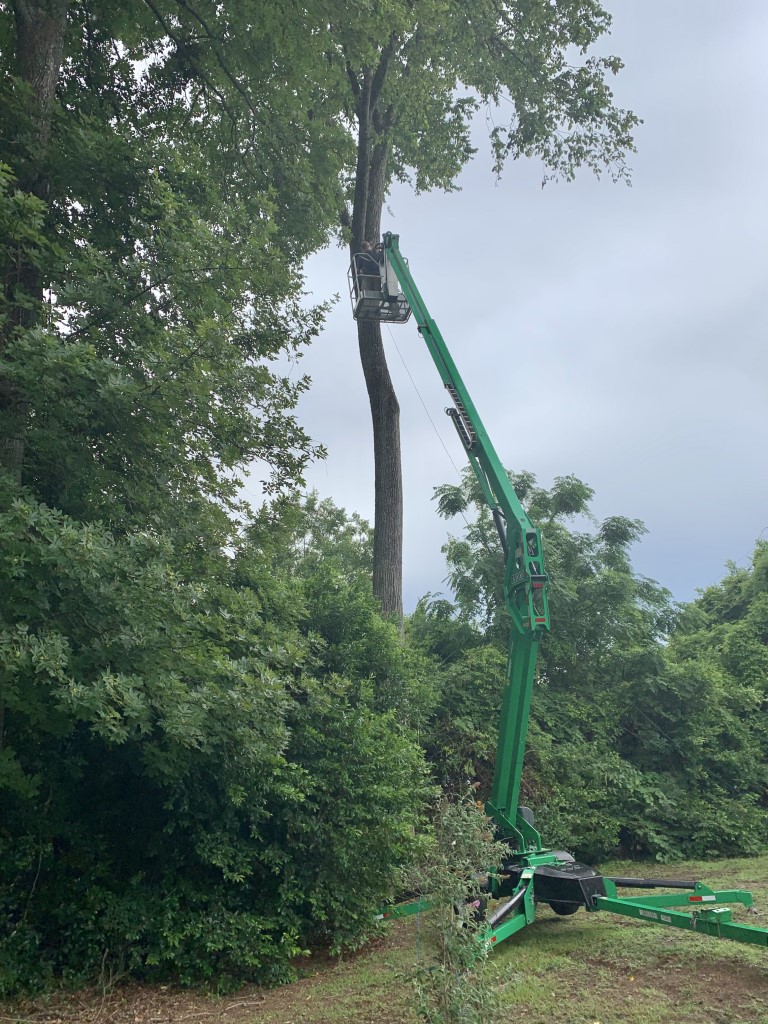
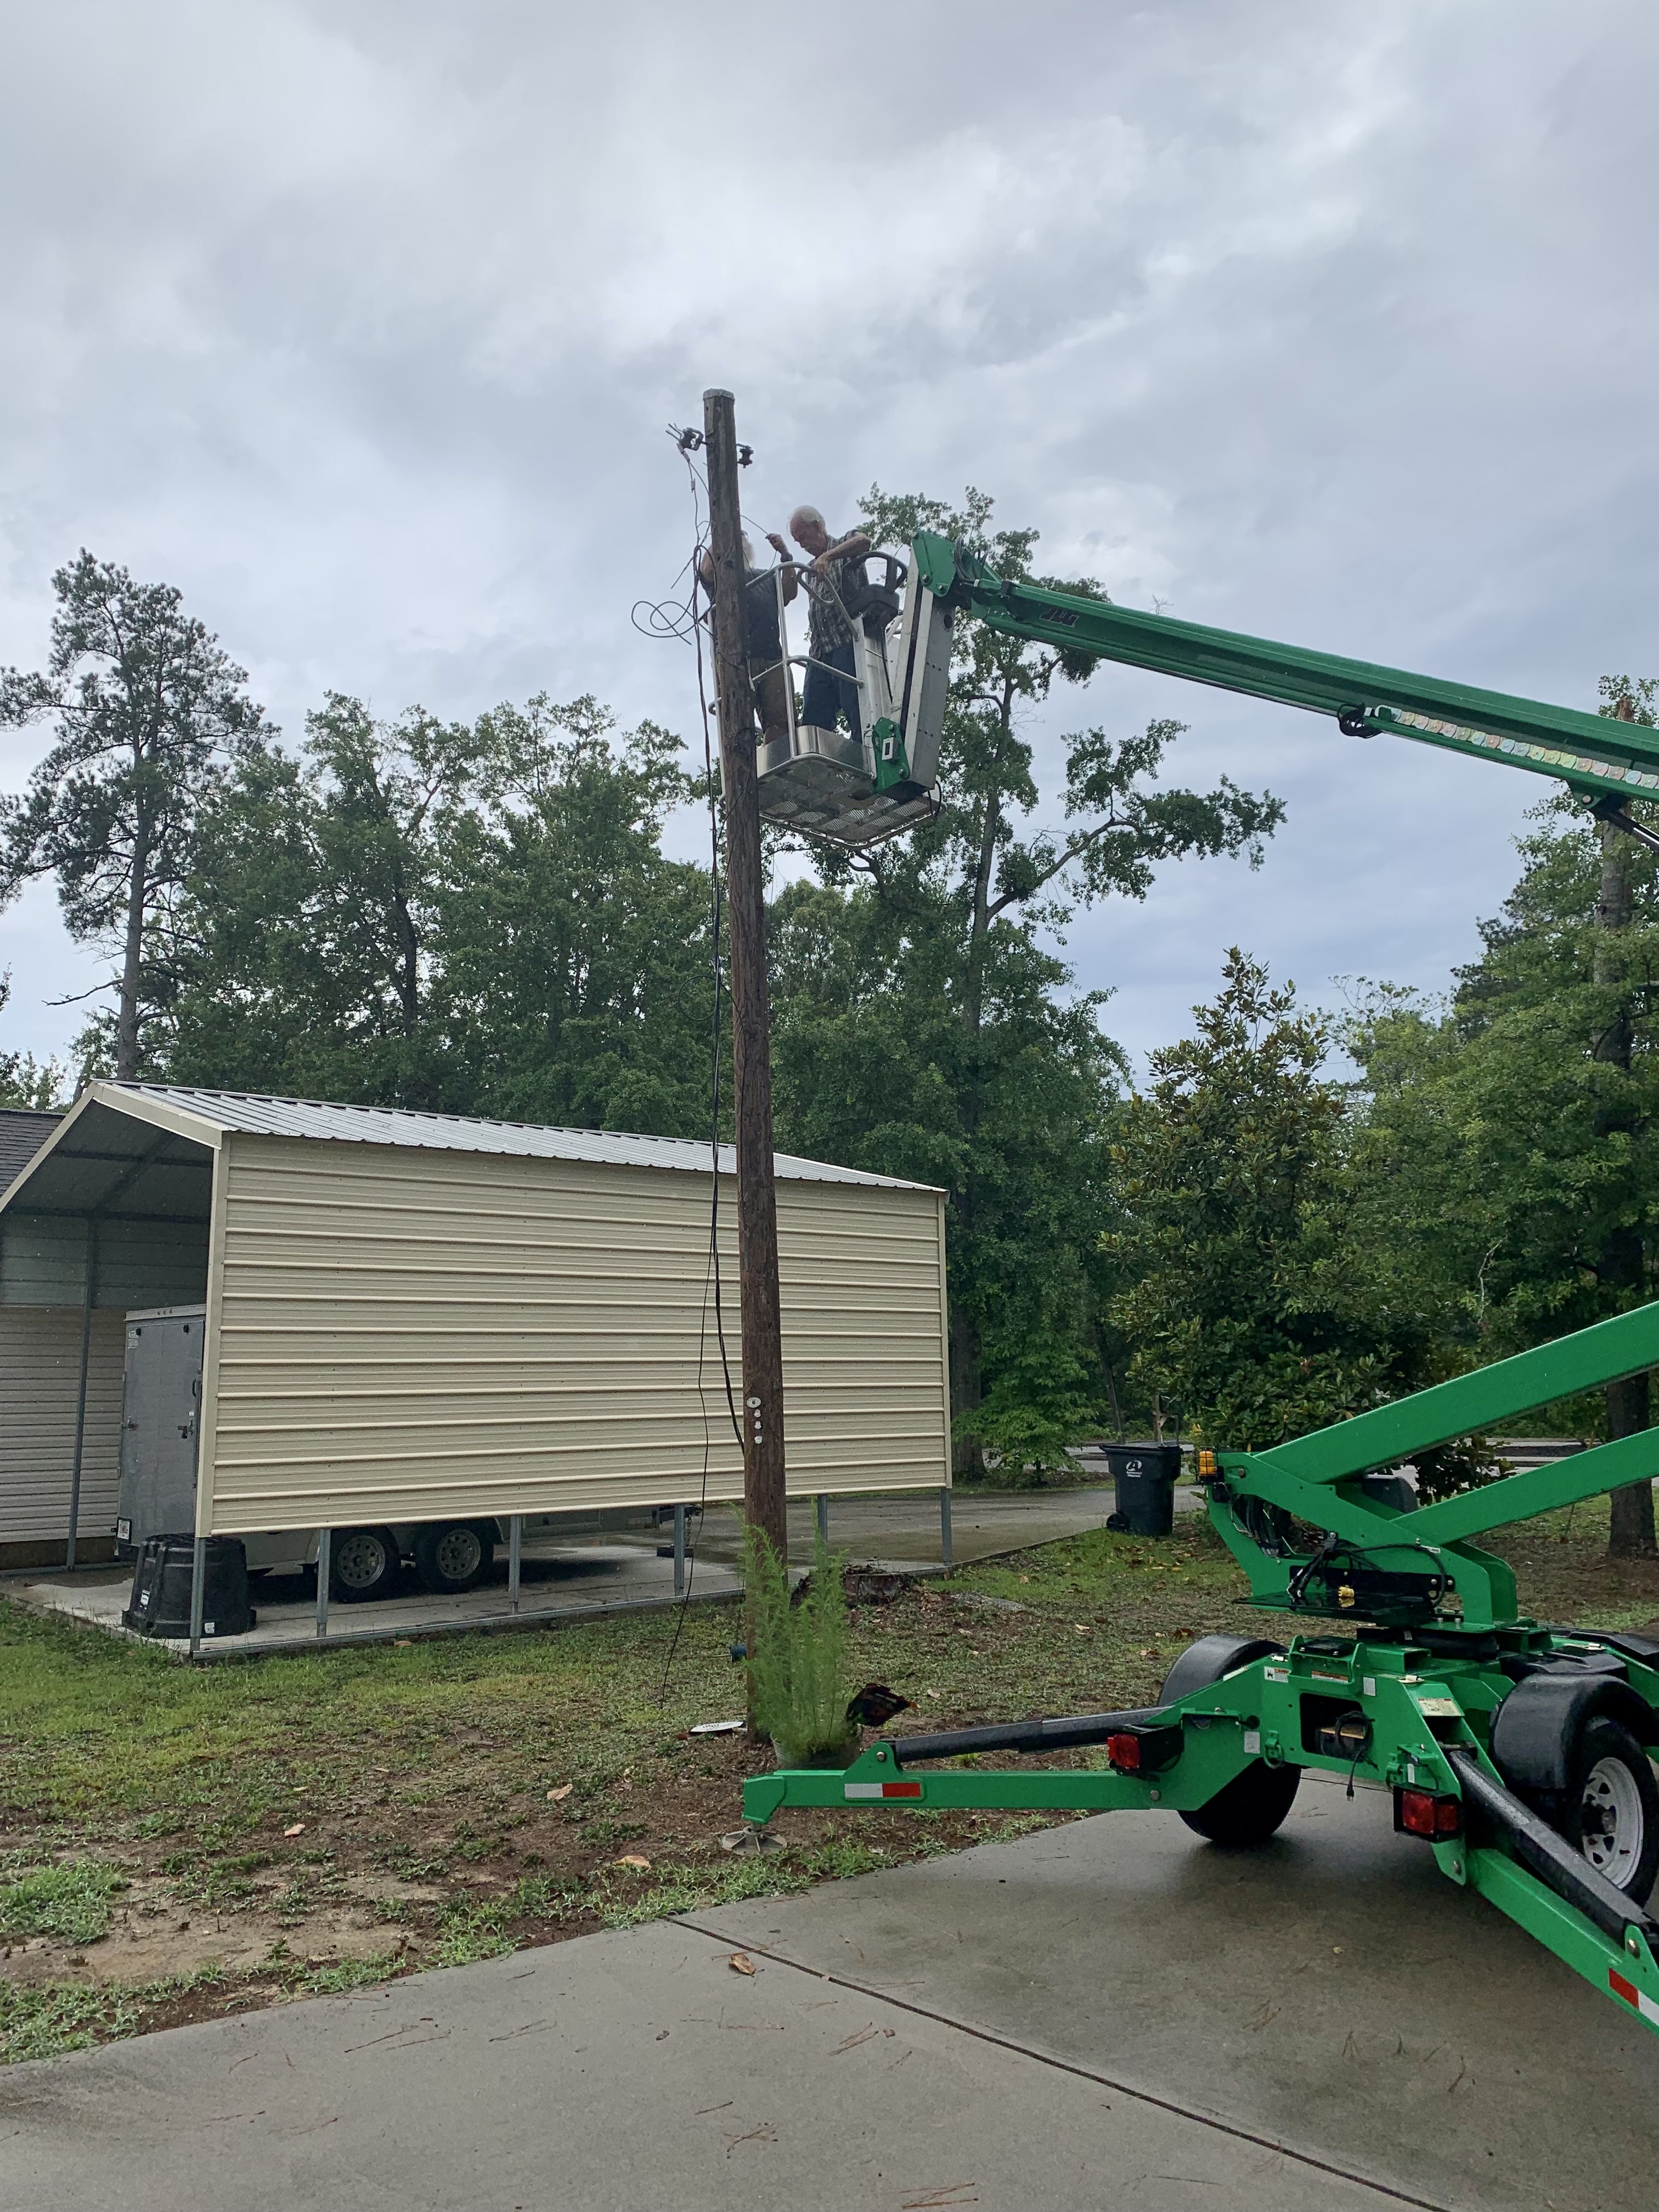
Since we already had the lift, I took advantage of the opportunity to place a couple of ropes and pulleys for future use. The first about 40-45 feet up in a hickory tree, and the other on an old utility pole beside the driveway.
Installing a pulley and rope on a tall hickory tree in my yard.Removing some old wires and installing a rope and pulley at the top of this utility beside my driveway.
We had to take a short break for rain and thunderstorms. (The new antennas survived their first thunderstorm.) Even though there were a few adjustments made along the way, overall the project went as planned and was successful. Unfortunately, we did not have the same luck earlier in the day at Rusty’s house, because we could not get the lift into a position where the bucket would reach his antenna mast. I sure wish that had gone better.
I have not yet had a chance to fully test the performance of the new antennas. The new 2M/70cm has higher gain and is mounted 10 feet higher than the previous antenna. The 6M HO Loop is very narrow-band, but the SWR is nearly perfect at 50.3 MHz, so it will be great for digital and CW work. I did tune to 50.313 MHz and could hear and decode lots of FT8 from stations participating in the ARRL June VHF Contest. I’ll make some additional posts with my observations about the performance as I operate more with these antennas.